Handmade

Make Your Own Halloween Ghost Decoration

img_4211-copy.jpg

Our new neighborhood has some legit Halloween decorations. Other than a few pumpkins, we never decorated the outside of our house for Halloween. As we're on a tight budget, I decided to decorate using items we already had on hand. The result was a trio of spooky Halloween ghosts. To make your own inexpensive spooky Halloween ghosts, you'll need:

- A tennis ball - A white garbage bag (ours was 13 gallon) - A white zip tie - A black permanent marker - A corsage pin - Fishing wire - Scissors

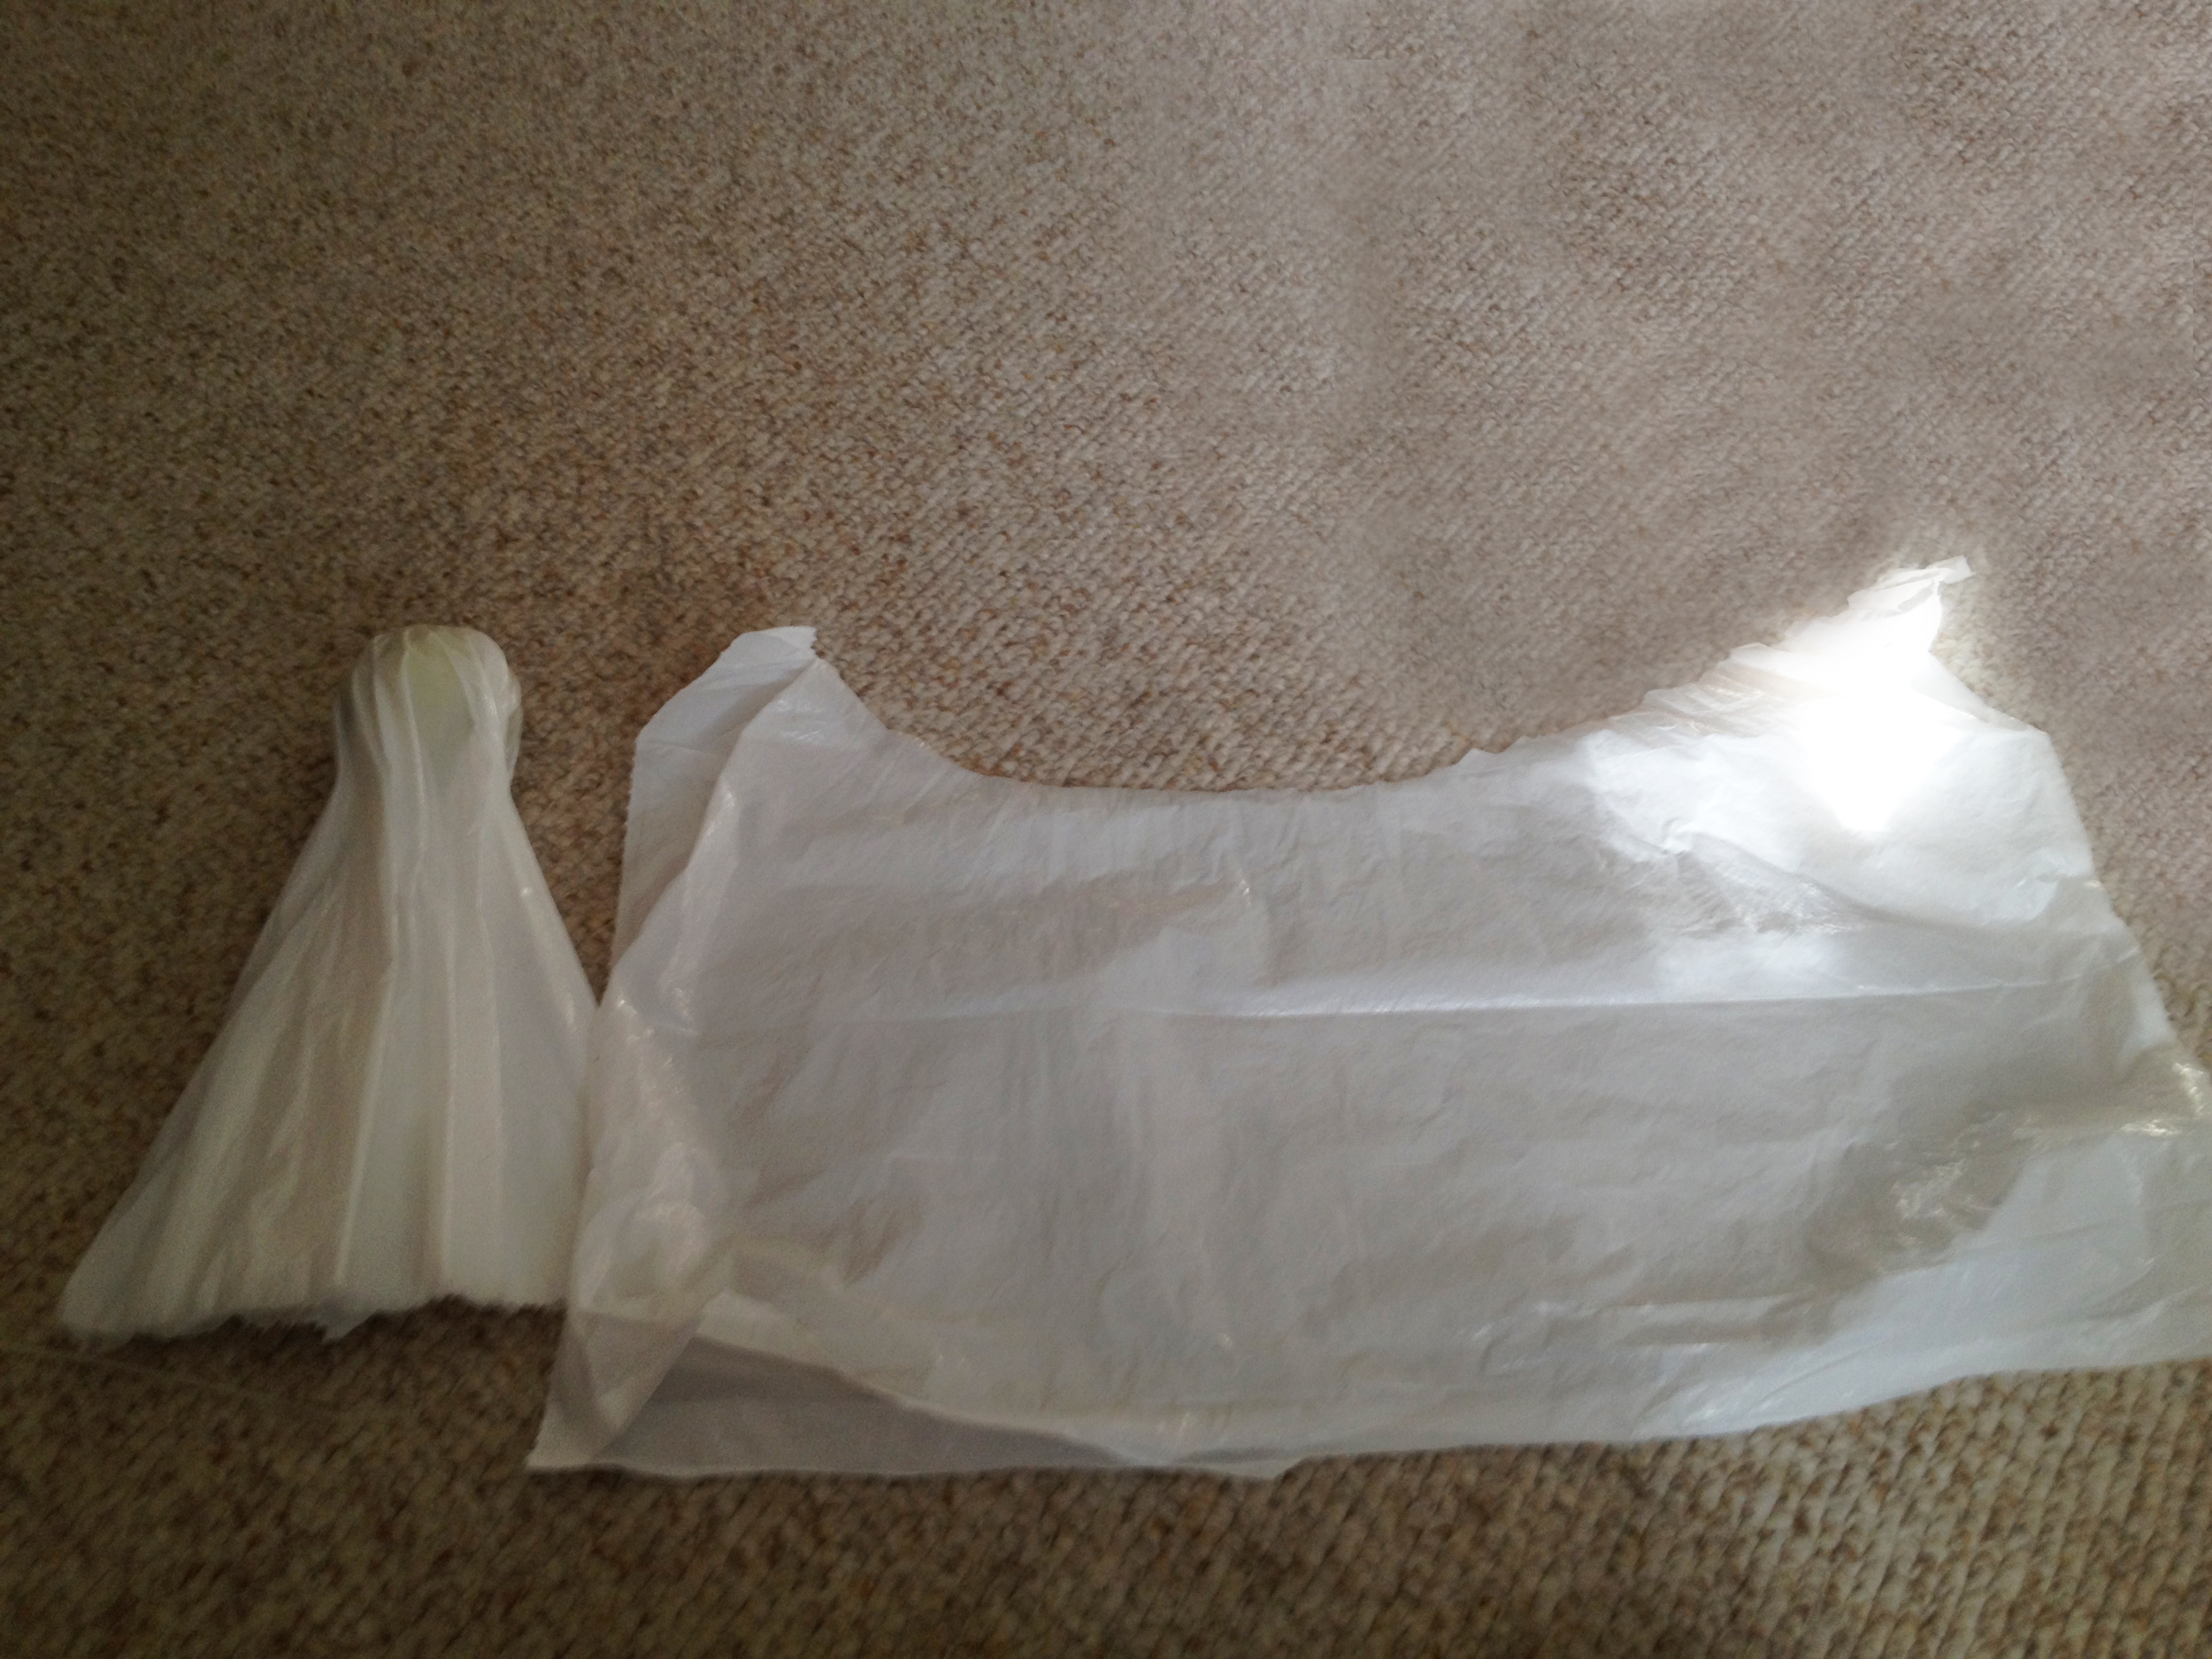
Before I started, I cut off the drawstring part of my bag. Then I took my tennis ball and put it inside the bag, right in the center of the bottom:

step 1

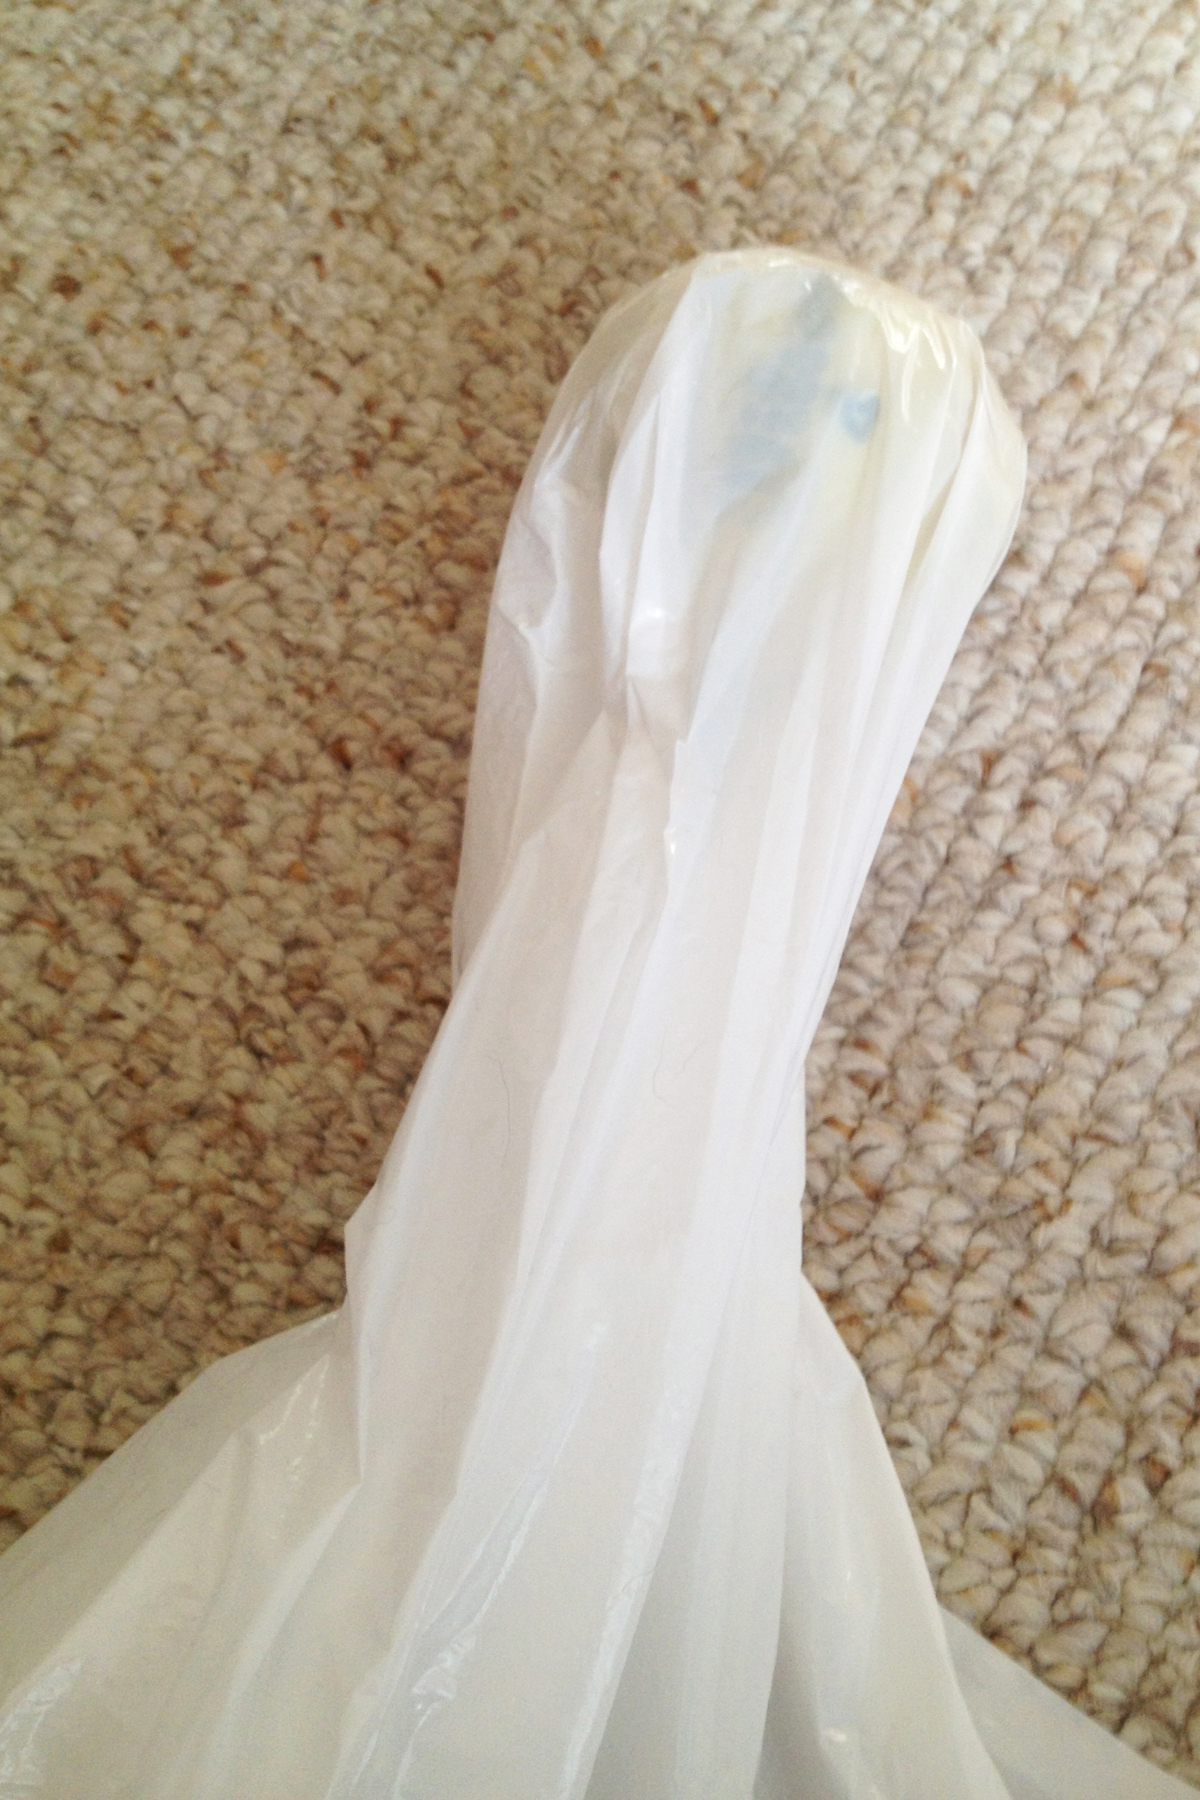
Place one hand on the ball to keep it from moving, and use your other hand to cut off about half of the bag. It doesn't have to be a perfectly straight line. Here's what it should look like after you've made the cut:

step two

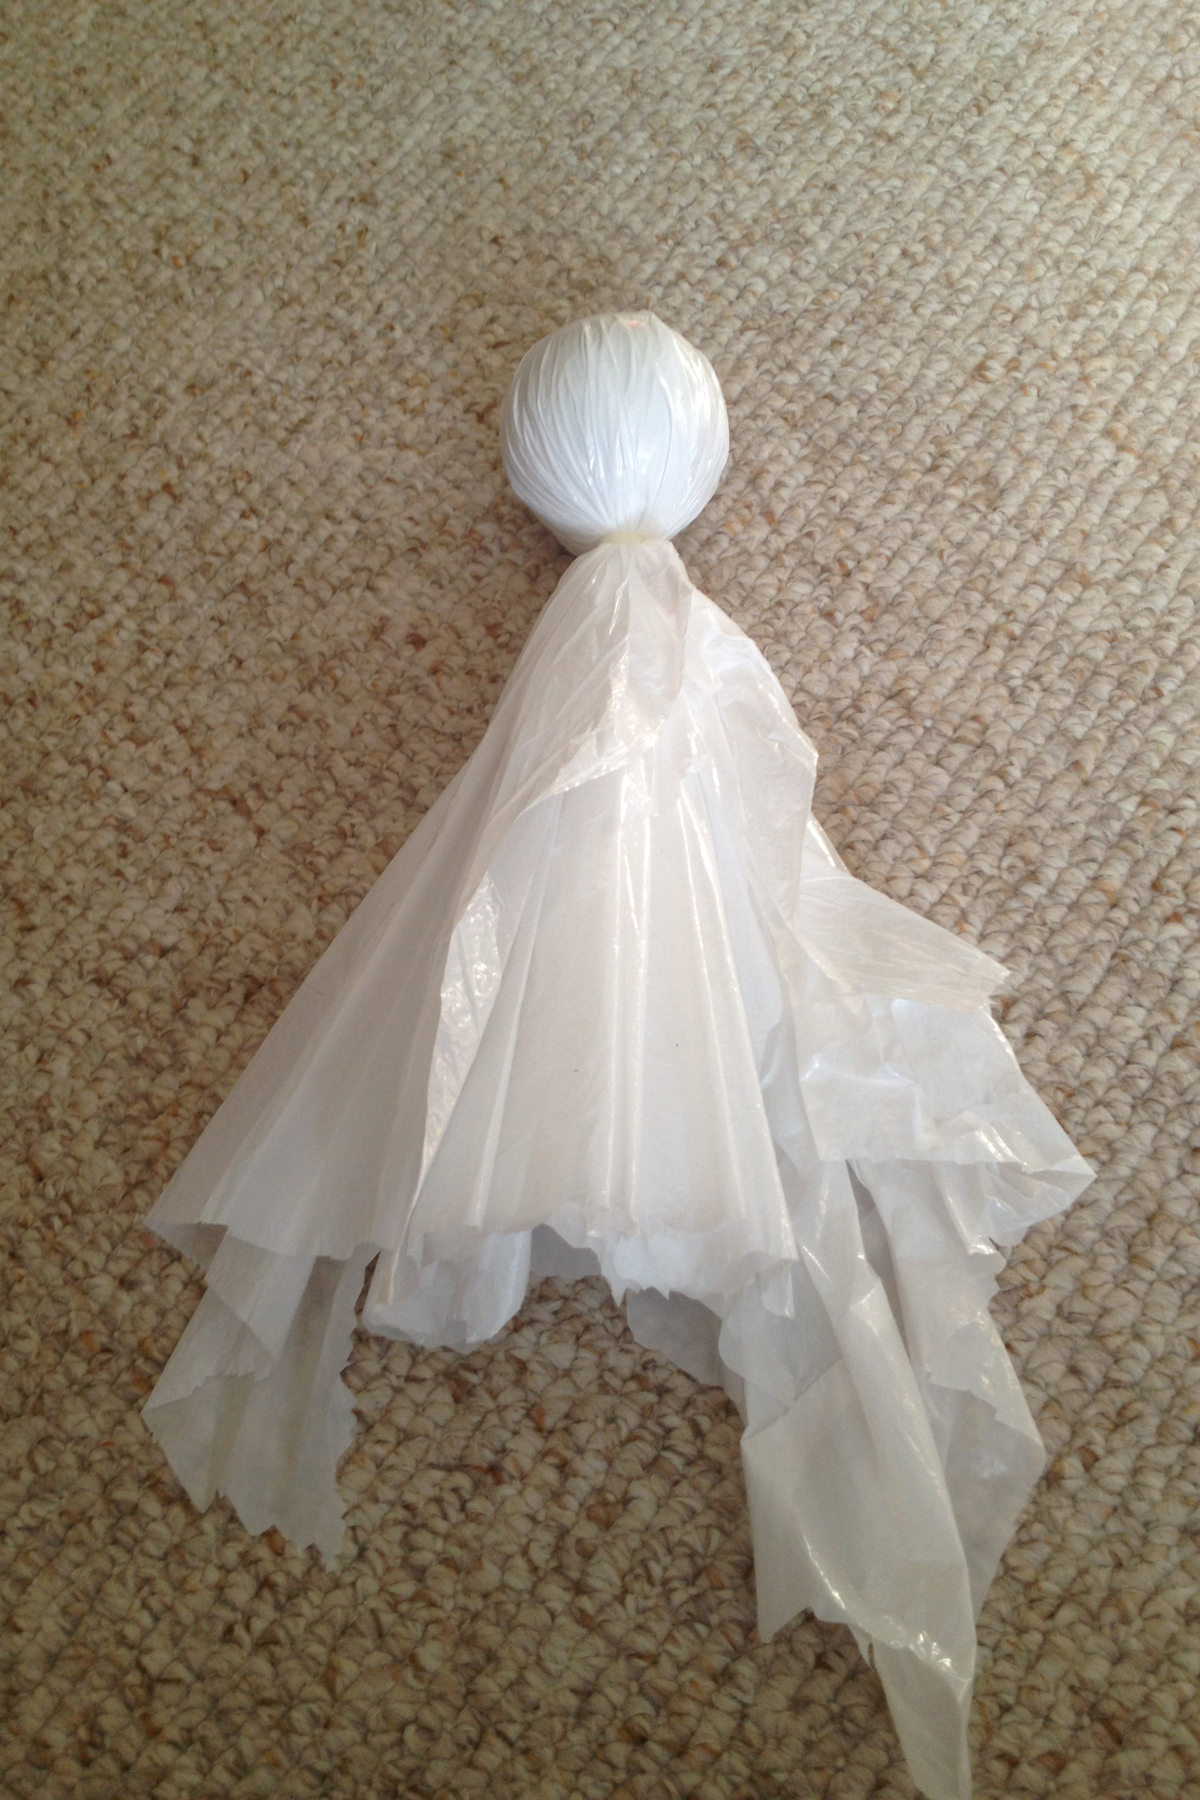
The cut piece is basically a big circle. I made a cut at both ends (along the bag's seams), and I was left with two identical pieces. I placed both of those pieces on top of the original bag, pulled them tight and then secured the zip tie around them. Then I used the scissors to cut off the end of the zip tie. Here's what it should look like once you've done that:

step three

Next, I placed my corsage pin through the tennis ball at the very top of the ghost's head (yes, I felt like I was stabbing it in the head). I tied the fishing line around the head of the pin and knotted it a few times. It should look like this:

step four


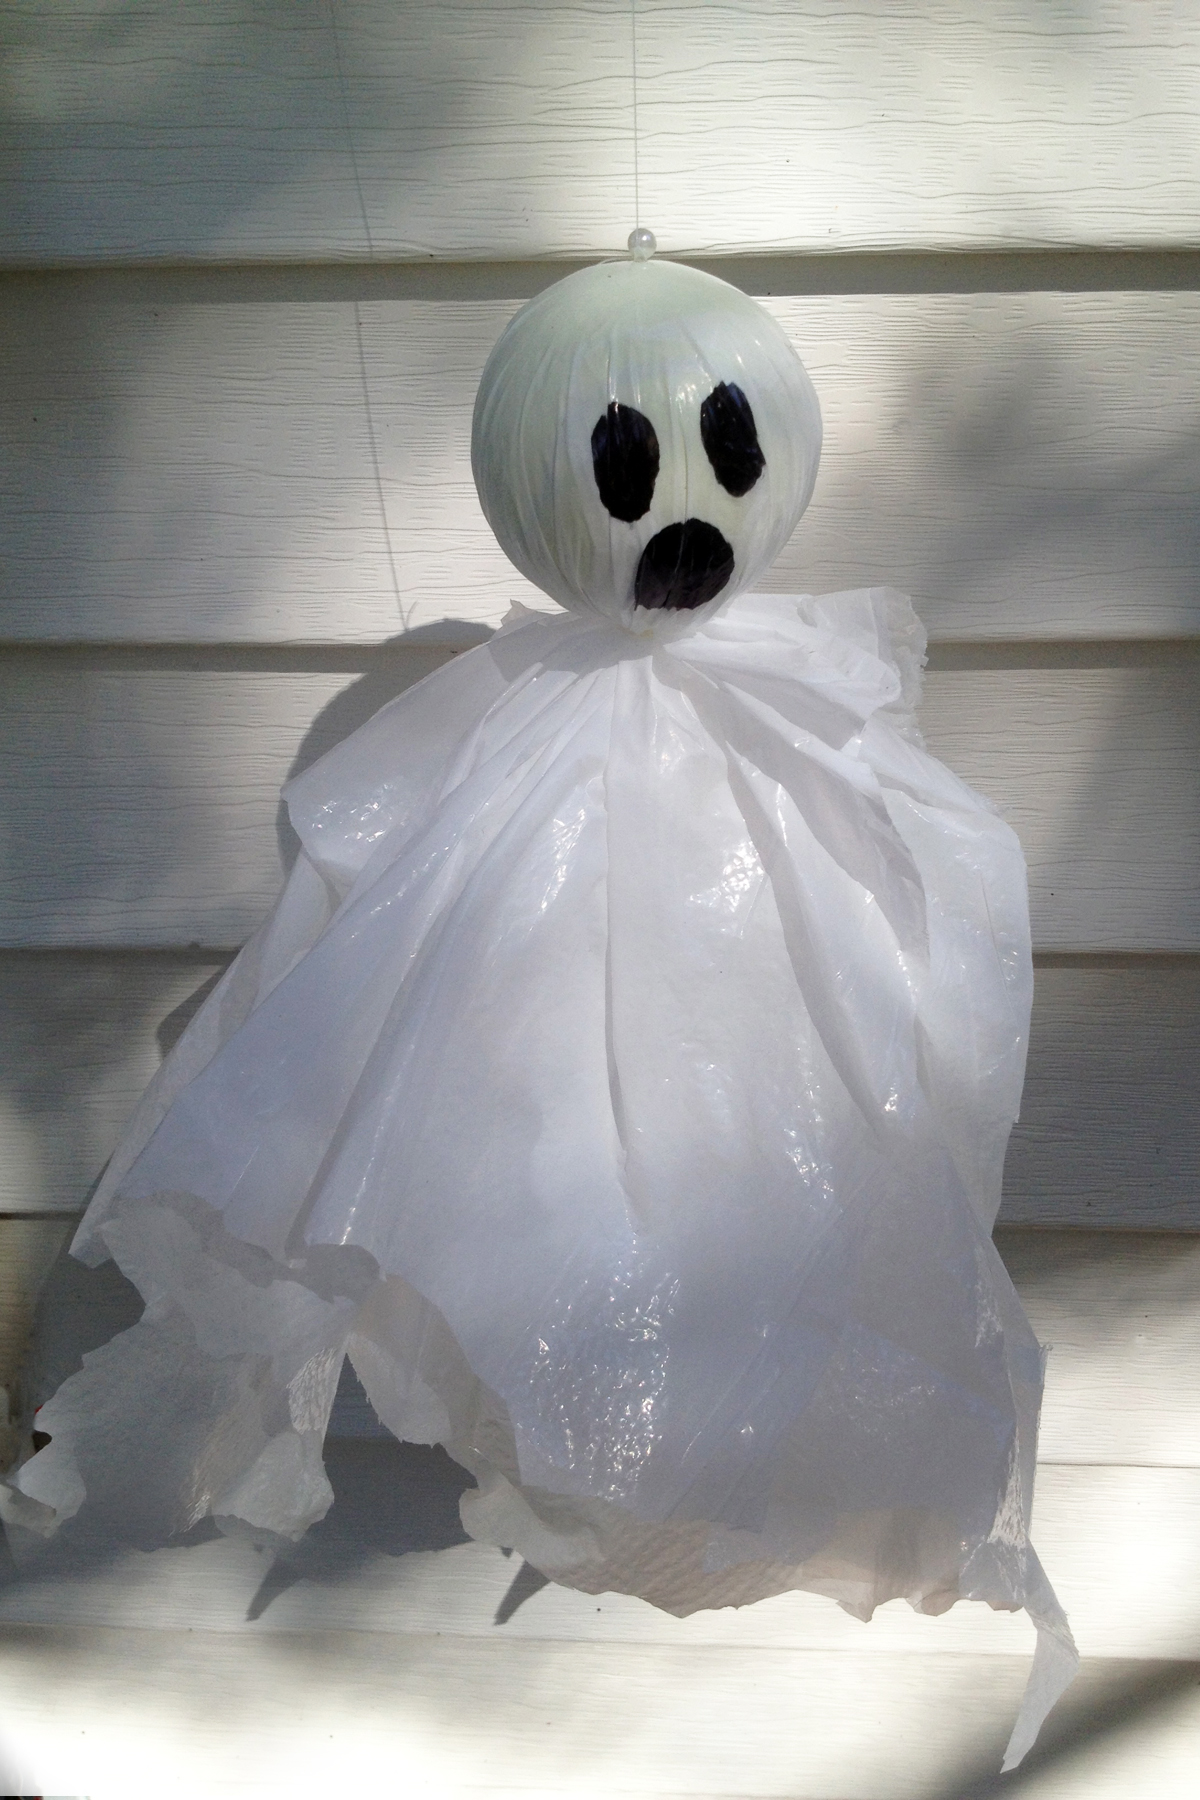
Finally, I drew a spooky face using the marker. My finished ghost looked like this:

step five

I made two more and hung them around our front stoop. When the wind catches them, they "fly" around. Pretty spooky!


DIY: Handmade Owl Baby Shower Card

On Sunday I turn 30. For the past year, I've been trying to come to terms with this, as I'm still not quite sure where the last decade has gone.

Last week, I read a list of 10 things that no one tells us about turning 30. One of the items on the list was babies. No one warns us that we'll be bombarded with babies when we turn 30. In my case, I've actually been bombarded with babies since I got married almost six years ago, but I guess it's going to get even more intense now. Good thing I like babies, and I don't mind answering the age-old question -- Do you have children? 

No, we don't have them. Yes, we would like them, whenever God decides we're ready for them.

Moving on...

As I clearly have babies on the brain and I attended an owl-themed baby shower for my sister-in-law last week, I decided to make an owl baby shower card. Owls appear to be quite popular these days, and they work for baby girls and boys. This particular version of the card is for a little boy.

Here’s what you’ll need to join me in the card making fun!

A variety of colored card stock - In this case, pale blue, green, black, brown and orange.

An envelope

A cutting mat

An Xacto knife

- A metal ruler

- Paper glue

- Basic scissors

- Embellishments of your choice

- Sticker letters

Start by using your mat to find the center of your card base (5.5 ” for this card). Then score it by running the knife lightly down the center once or twice. Fold in half.

step1


Cut out your mother owl shape, taking care not to cut too much off the folded side. I free-handed my owl, but you could trace your owl shape first, if you need a guide. Set your card base on top of the envelope to ensure the card will fit inside.

IMG_4181


Cut out the following pieces: two circles (eyes - green), two smaller circles (pupils - black), one triangle (beak - orange), two hearts (one slightly smaller than the other - green and blue), two feet (orange) and two long half circles (wings - green). When I cut out two or more of the same shape, I free-hand the first one, and then use it to cut out the next one. This way I know they are all the same size.

step2


Glue each piece down, making sure they are all inside the perimeter of the envelope. Then, if you're like me, attach your feet...I almost forgot them!

step3

Next, open your card, and cut out the shapes again. Only this time, we're going to make them much smaller. This is your baby owl. For the baby, I chose to make a brown body, green eyes and wings and a blue heart. Glue down each piece.

On the opposite side, use your sticker letters to spell out your message. At this point, you could add embellishments -- rhinestones, glitter, more letters to spell out the baby's name -- the possibilities are endless! I loved the way this card turned out. Handmade cards are so much more personal and fun, don't you think?

step5

Like this card but don't think you can recreate it? Contact us, and we'll create one for you to purchase via our Etsy shop. The Owl Baby Shower Card is $3.50, plus shipping and handling.

DIY: Handmade Halloween Pumpkin Card


On Sunday, the weather turned, and all of a sudden, it feels like fall around here. Thanks to the slight chill in the air and the falling leaves, we've had Halloween on the brain. For that reason, I decided it was time to create a Halloween card. Although I love all of the Halloween motifs, I decided to make a pumpkin card.

Here’s what you’ll need to join me in the card making fun!


A variety of colored card stock - In this case, orange, black and green


An envelope


A cutting mat


An Xacto knife


- A metal ruler


- Paper glue


- Basic scissors


- Sticker letters

Start by using your mat to find the center of your card base (5.5 ” for this card). Then score it by running the knife lightly down the center once or twice. Fold in half.

step1

Using your scissors, round off the short sides of your card, taking care not to cut too much off the folded side.

step2

Grab your envelope, and made sure you leave enough room for your pumpkin's stalk. Glue the stalk to the card case.

step3

Cut out three triangles (your pumpkin's eyes and nose). I free-hand the first triangle, and then use it to cut out the other two. This way I know they are all the same size.  I also cut out a half circle for a mouth. If you want your pumpkin to have teeth, carefully cut two rectangles out of the half circle. Arrange your face to make sure everything fits nicely. Trim the pieces down if necessary.

step4

Once you're happy with your face, glue the triangles and half circle to your card base.

step5

Open your card, and use your sticker letters to write a happy or spooky message. I chose a happy message for this particular card. Add your personal note, and you're ready to send a friend or family member some Halloween cheer!

step6

Like this card but don't think you can recreate it? Contact us, and we'll create one for you to purchase via our Etsy shop. The Halloween Pumpkin Card is $3.50, plus shipping and handling.

DIY: handmade "thinking of you" card

What says "I'm thinking of you" more than a handmade card? It's a lovely gesture that is both charming and one of a kind. Today I'll show you how to make a simple card of your very own.

You'll need:

Card stock (I chose teal, yellow and khaki) - An envelopeCutting matXacto knife - A metal ruler - Paper glue - Basic scissors - Several chipboard shapes, a mini paper bag and other embellishments of your choice - Washi tapeCrafting scissors - Sticker letters - Pens (I like Micron and Sharpie)

First, I selected an envelope. I had a 6.5 x 6.5 inch envelope on hand, so I cut my card down to 6.25 x 9.375. Why 9.375? I wanted the front side (3.125) to be half the length of the back (6.25).

step1

To make the fold for my square card, I turned my card sideways, measured off 3.125, lined up my ruler and carefully ran my Xacto knife from the top to the bottom. I only did this once, and it looked like this after I turned it the right way:

step2

Next I cut a piece of yellow card stock to 4 x 6.25.

step3

I ran a strip of paper glue along the top front of the yellow card and attached it to the bottom of the front flap of the teal card. It looked like this:

step4

Next I cut a 2.5 x 6.25 inch piece of khaki card stock and used my crafting scissors to make a scalloped edge along one side. I attached it to the bottom of the front flap of the card with the paper glue, leaving a little bit of the teal peeking out below:

step5

Once the glue dried, I added washi tape for a little extra decoration.

step6

The recipient of my card is a photographer, so I customized the card with a vintage camera chipboard shape I found in my craft drawer. Although the shape had glue on the back, I added a little extra paper glue to make sure it would stay put.

step7

Next I moved to the inside of the card and added another strip of yellow paper (4 x 6.25) to complement the top of the card. Again, I used paper glue to secure it to the middle of the bottom inside panel.

step8

I went back to my crafting stash and found this sweet little paper bag that is the same khaki color as the strip on the front of the card. I glued it down and added some washi tape over the top of it. Next I added another chipboard piece in a teal color, as well as a note in the mini bag for my friend. I tied everything together by using the crafting scissors to add a scallop edge to the top of the note.

step9

step10

I raided the craft drawer one last time and found some sticker letters in a variety of sizes, so I used them to add my message to the top inside panel.

step11

As my envelope was yellow, I cut another piece of teal card stock to 6.5 x 6.5 inches and glued it to the front of the envelope. For a final touch, I added another strip of washi tape across the top. I also sealed the envelope with washi tape. It's the best!

When it comes to card making, the possibilities are endless. Here's another card I recently made that uses a similar design but different colors...

option2outside

Remember that when it comes to handmade card making, it's the thought that matters most!

option2inside