Handmade

lauren wedding invitation

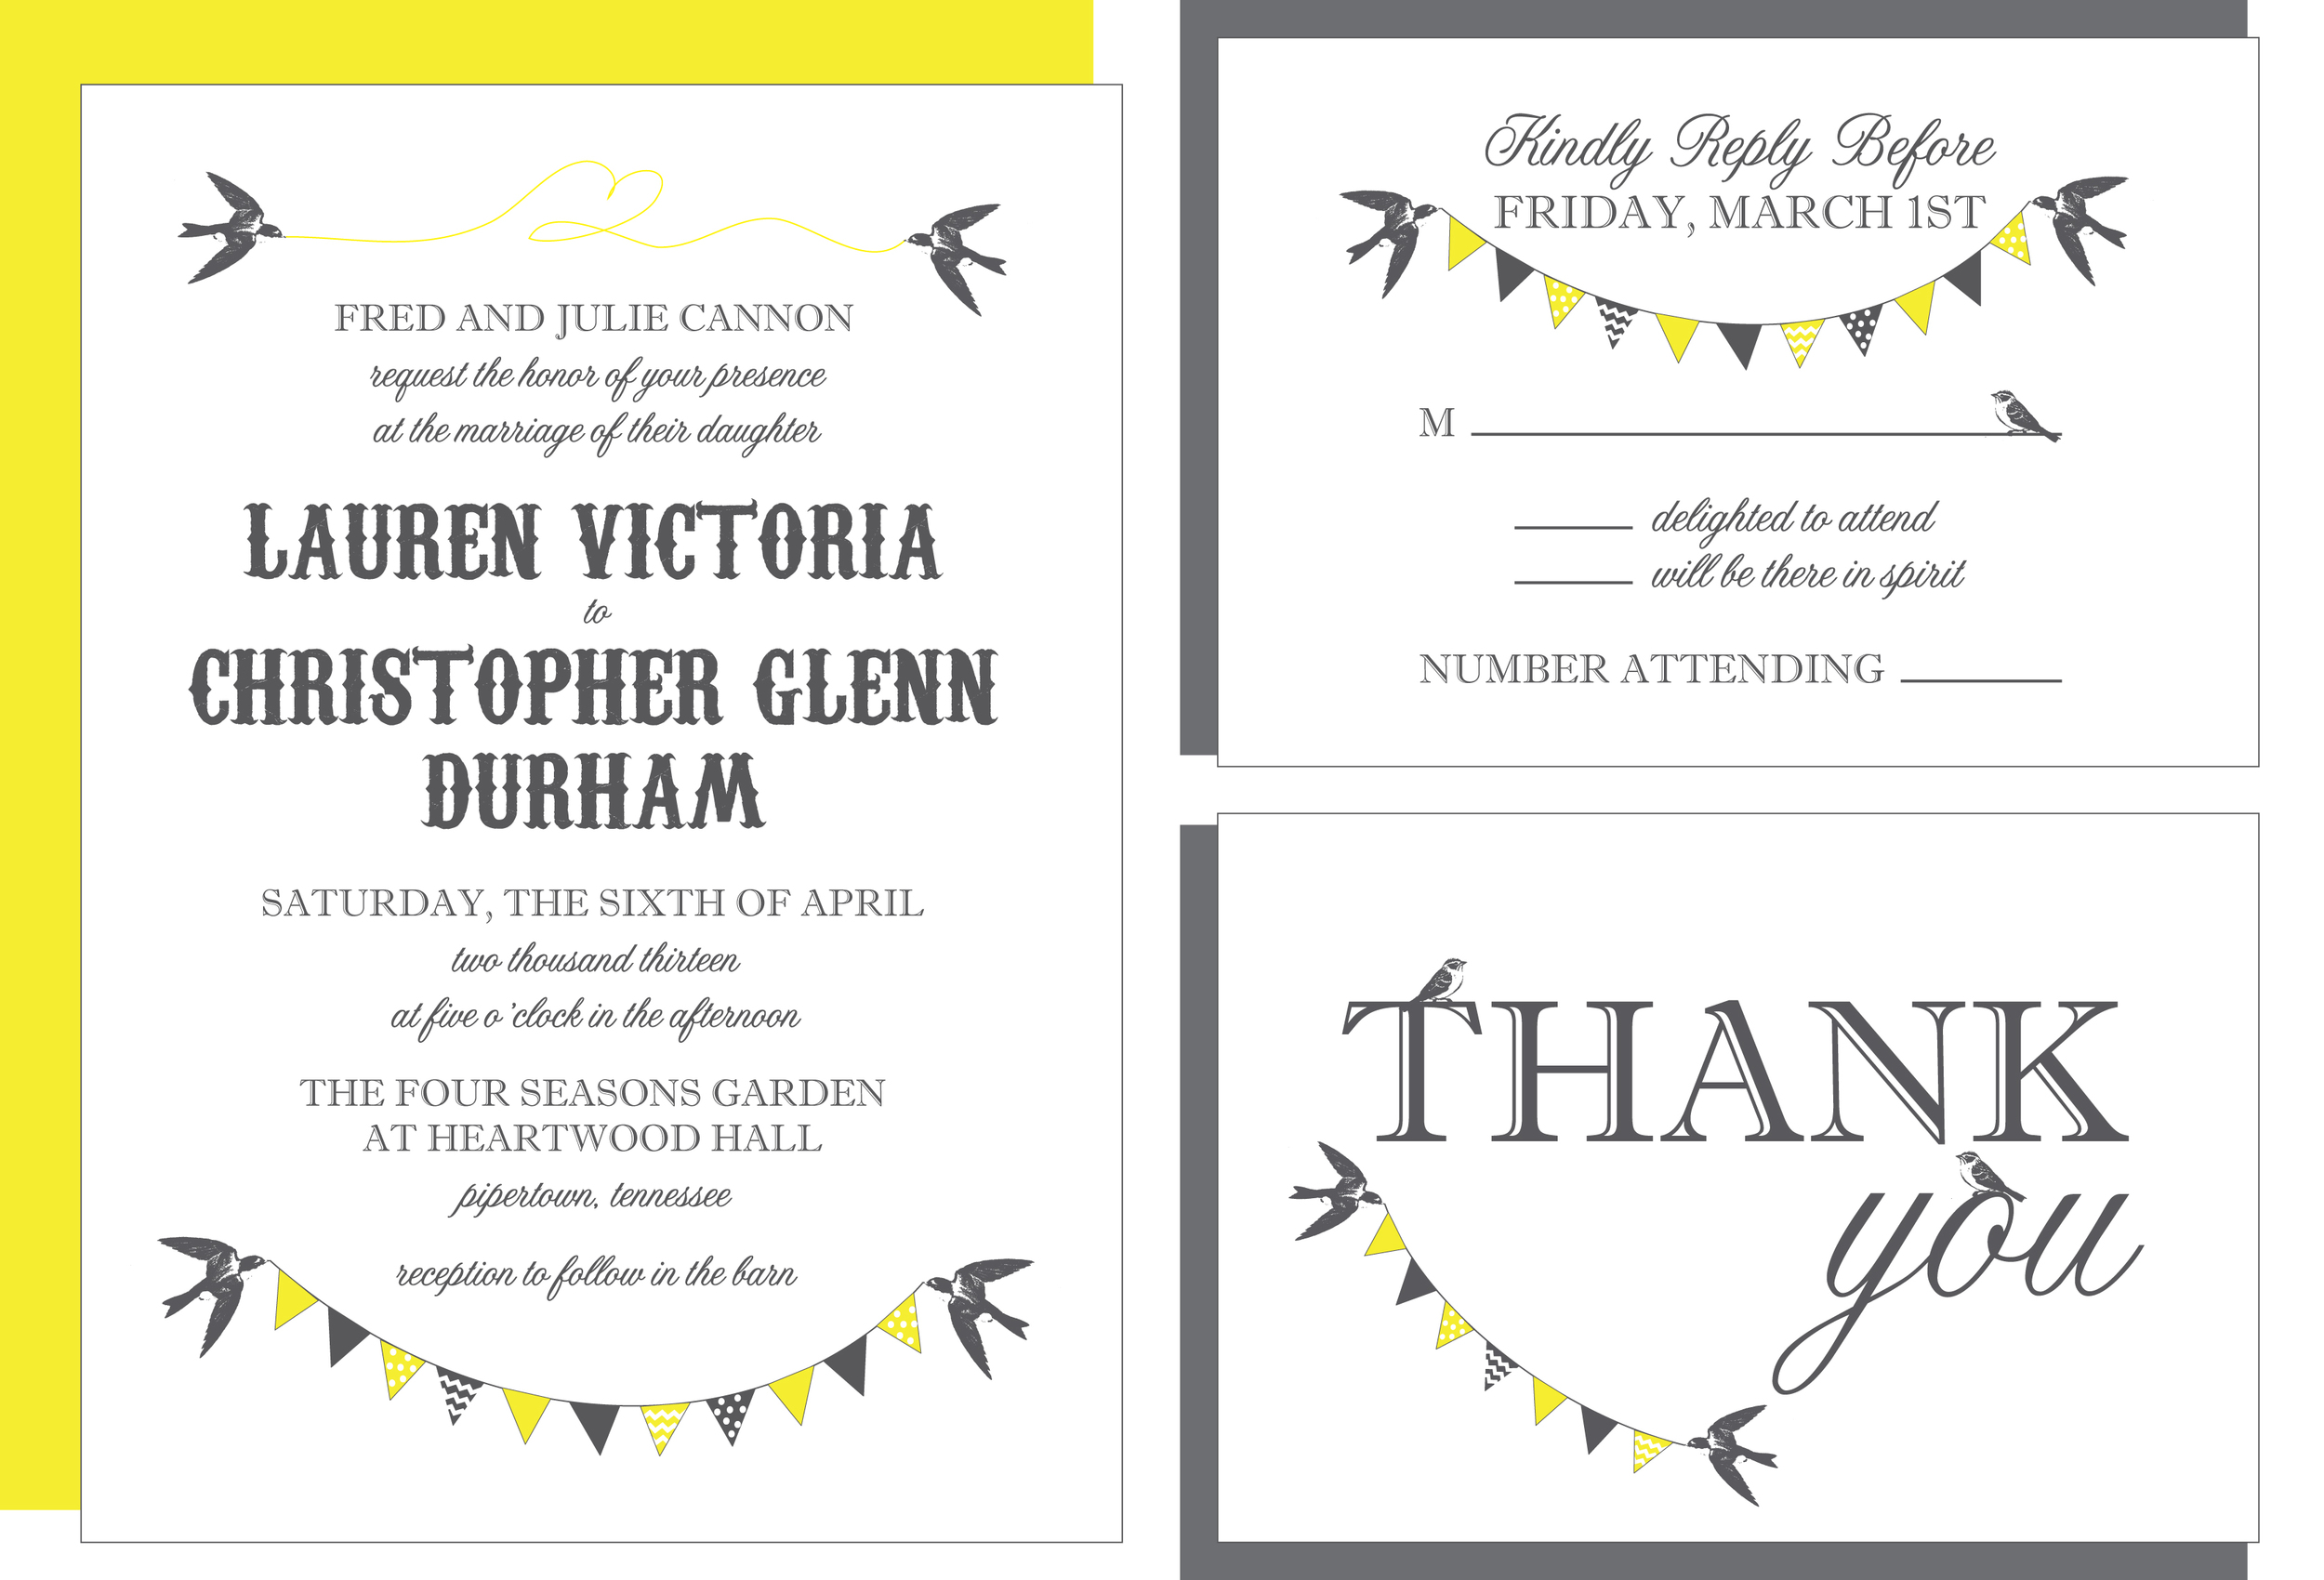
This week we're featuring the Lauren wedding invitation suite. The fonts and gray and yellow color combination are both cheerful and classic, and they feel appropriate for a spring or summer wedding. For a little added personality, the back of the invitation and RSVP card can be customized in either solid yellow, yellow with white polka dots or yellow with white chevron stripes.

The actual wedding that inspired this suite took place at a historic plantation in the country, so the vibe was rustic, vintage and elegant. The bride loved the bunting detail so much that she hired us to create fabric polka dot and chevron bunting for the reception. You can see more details from the wedding here

If yellow and gray aren't your wedding colors, no worries! The colors of the Lauren wedding suite are completely customizable. For more information about the Lauren wedding invitation, suite, simply drop us a line here, and we'll be in touch! 

laurensuite.jpg

diy princess birthday card

Eliza, our niece, turns eight today. She just happens to be one of our favorite people, and I'm not just saying that because she's family. She is one of those special people who is smart, funny and drop-dead beautiful. She loves to read, makes all As in school, has a wonderful sense of style (she is a mini shopaholic), loves everyone and has a fun, witty personality. She became a big sister a few months ago, and she was thrilled when she received the news that she wasn't going to be an only child anymore. She absolutely loves her baby sister, and sharing the spotlight doesn't bother her at all. She is a very special little person.

In honor of her birthday, we decided to make a princess card. She is a princess, and she's at the age where she loves all things girly -- makeup, Barbies and shopping. A princess card seemed like a good fit for her.

Here's what you'll need to make your own princess card:

A variety of colored card stock (I used plain and patterned for this card)
An envelope
A cutting mat
An Xacto knife
- A metal ruler
- Paper glue
- Basic and scalloped scissors
- Embellishments (I chose rhinestones)
- Markers (Mine are fine-tip Crayola)
-Fun stickers
-Ribbon

princess card step 1

First, use your mat to find the center of your card base (5" for this card), and then score it by running the knife lightly down the center once or twice. Fold in half.

Princess card step 2

Choose another piece of card stock in a different color, and cut it down to the size of the front of your card (in my case, 7" x 5").

Princess card step 3

On the flat piece of card stock, draw the shape of a crown. Remember, we aren't going for perfection here!

Princess card step 4

Cut out your crown shape. Also cut out a strip of patterned paper that is the width of your card (mine was 7"). This is going behind the crown, so the height needed will vary. Mine was approximately 2.5".

Princess card step 5

Glue the patterned stripe and the crown to the front of your card. Let it dry thoroughly.

princesscard6.jpg

While the front is drying, add some embellishments to the inside of the card. I added another strip of patterned paper, some stickers and a pretty piece of ribbon that I had in my crafting stash. As I am completely out of letter stickers, I hand-addressed the message. 

Princess card step 7

Once the front of your card is dry, add some embellishments of your choice. I used some scraps of my base color to cut out jewels in various shapes as well as a strip to go across the bottom. For some interest, I used my scalloped scissors to add a special edge to that strip. Then I glued everything down and added some rhinestones, sequins and stickers. I paired this sparkly card with a shiny silver envelope and more fun stickers. 

princesscard8.jpg

The result is a card fit for a princess!

Happy Birthday, Eliza!

Christmas Collection Sneak Peek

cards8-copy.jpg

Gerald and Joan is excited to announce that our first collection of Christmas cards and postcards will debut later this week! While some of us are nostalgic all year long, most of us feel nostalgic at Christmastime. Whether we're baking cookie recipes that have been in our families for generations, singing carols and hymns that have been enjoyed for centuries or trimming our trees with ornaments that belonged to our parents and grandparents, Christmas is a time for treasuring memories, carrying on traditions and enjoying every moment of the season surrounded by our family and friends.

As nostalgia, tradition and heritage are all integral to our design process, it probably doesn't come as a surprise that our Christmas collection evokes those feelings. The collection features five snowy images from Gerald and Joan's personal archives. They are 1940s slides of Joan's childhood home in Gates Mills, Ohio, that I scanned and edited myself. The cards are printed on 110# bright white cover stock to highlight the breathtaking scenes, and they are accented with a dusting of extra fine white glitter and crystal "snow." To continue the sparkling theme, they are accompanied by metallic silver envelopes.

Like Gerald and Joan itself, this collection was a labor of love for us. It takes a little bit of our history and shares it with the world. Though simple, it accomplishes the founding principle of Gerald and Joan -- it preserves a little piece of history through our design work. It also makes us very proud.

Family and friends, look for your very own card from the collection in the mail this holiday season, as we plan to send out a Santa-sized sack of them! If you would like to support our work and send some of your very own, both the cards and postcards will be available for purchase through the blog on Friday. While we're partial for handwritten Christmas messages, they can also be personalized for easy mailing. :)

We would love to help you send out some vintage-inspired Christmas cheer this December!

[gallery type="rectangular" ids="2380,2379,2376,2375,2378,2373,2377,2374,2372"]