Although I have a fancy (for me) new printer and scanner as of last week, I have been making handmade cards all year and don't want to stop! Here's what you'll need to join me in the card making fun!
- A variety of colored card stock
- A metal ruler
- Paper glue
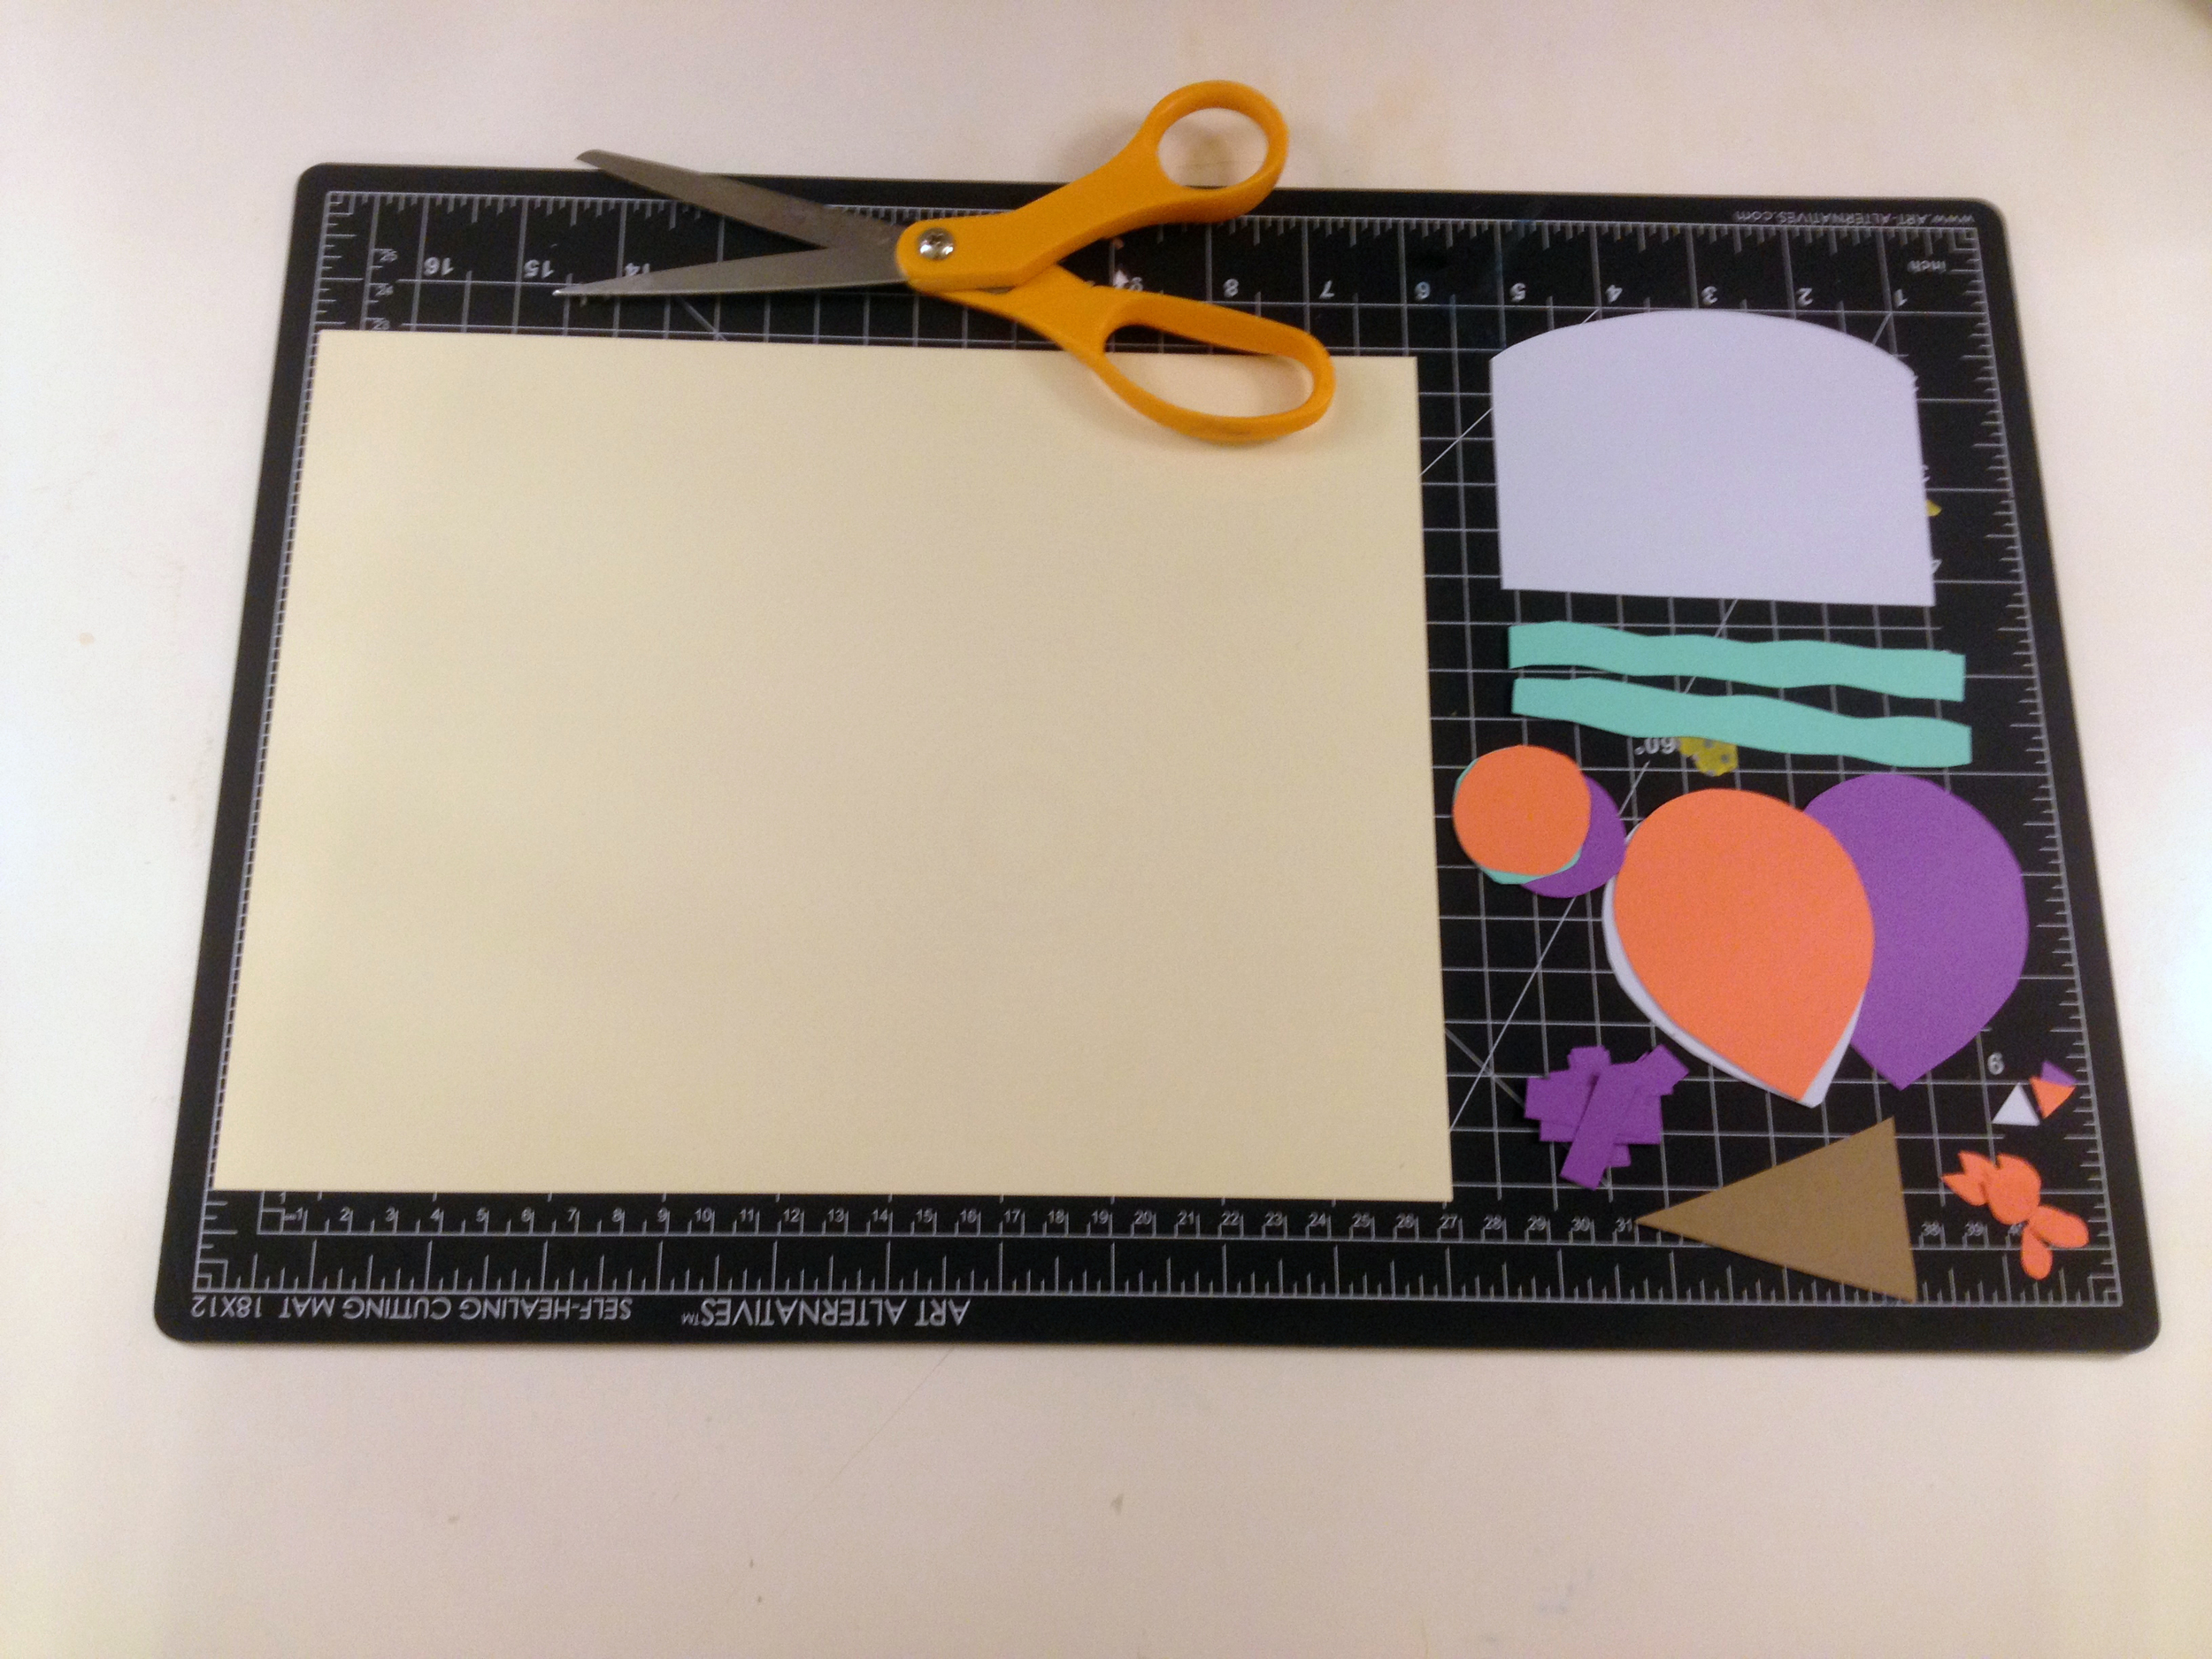
- Basic scissors
- Embellishments (I chose rhinestones)
- Markers (Mine are fine-tip Crayola)
- Yarn
- Hot glue and glue gun
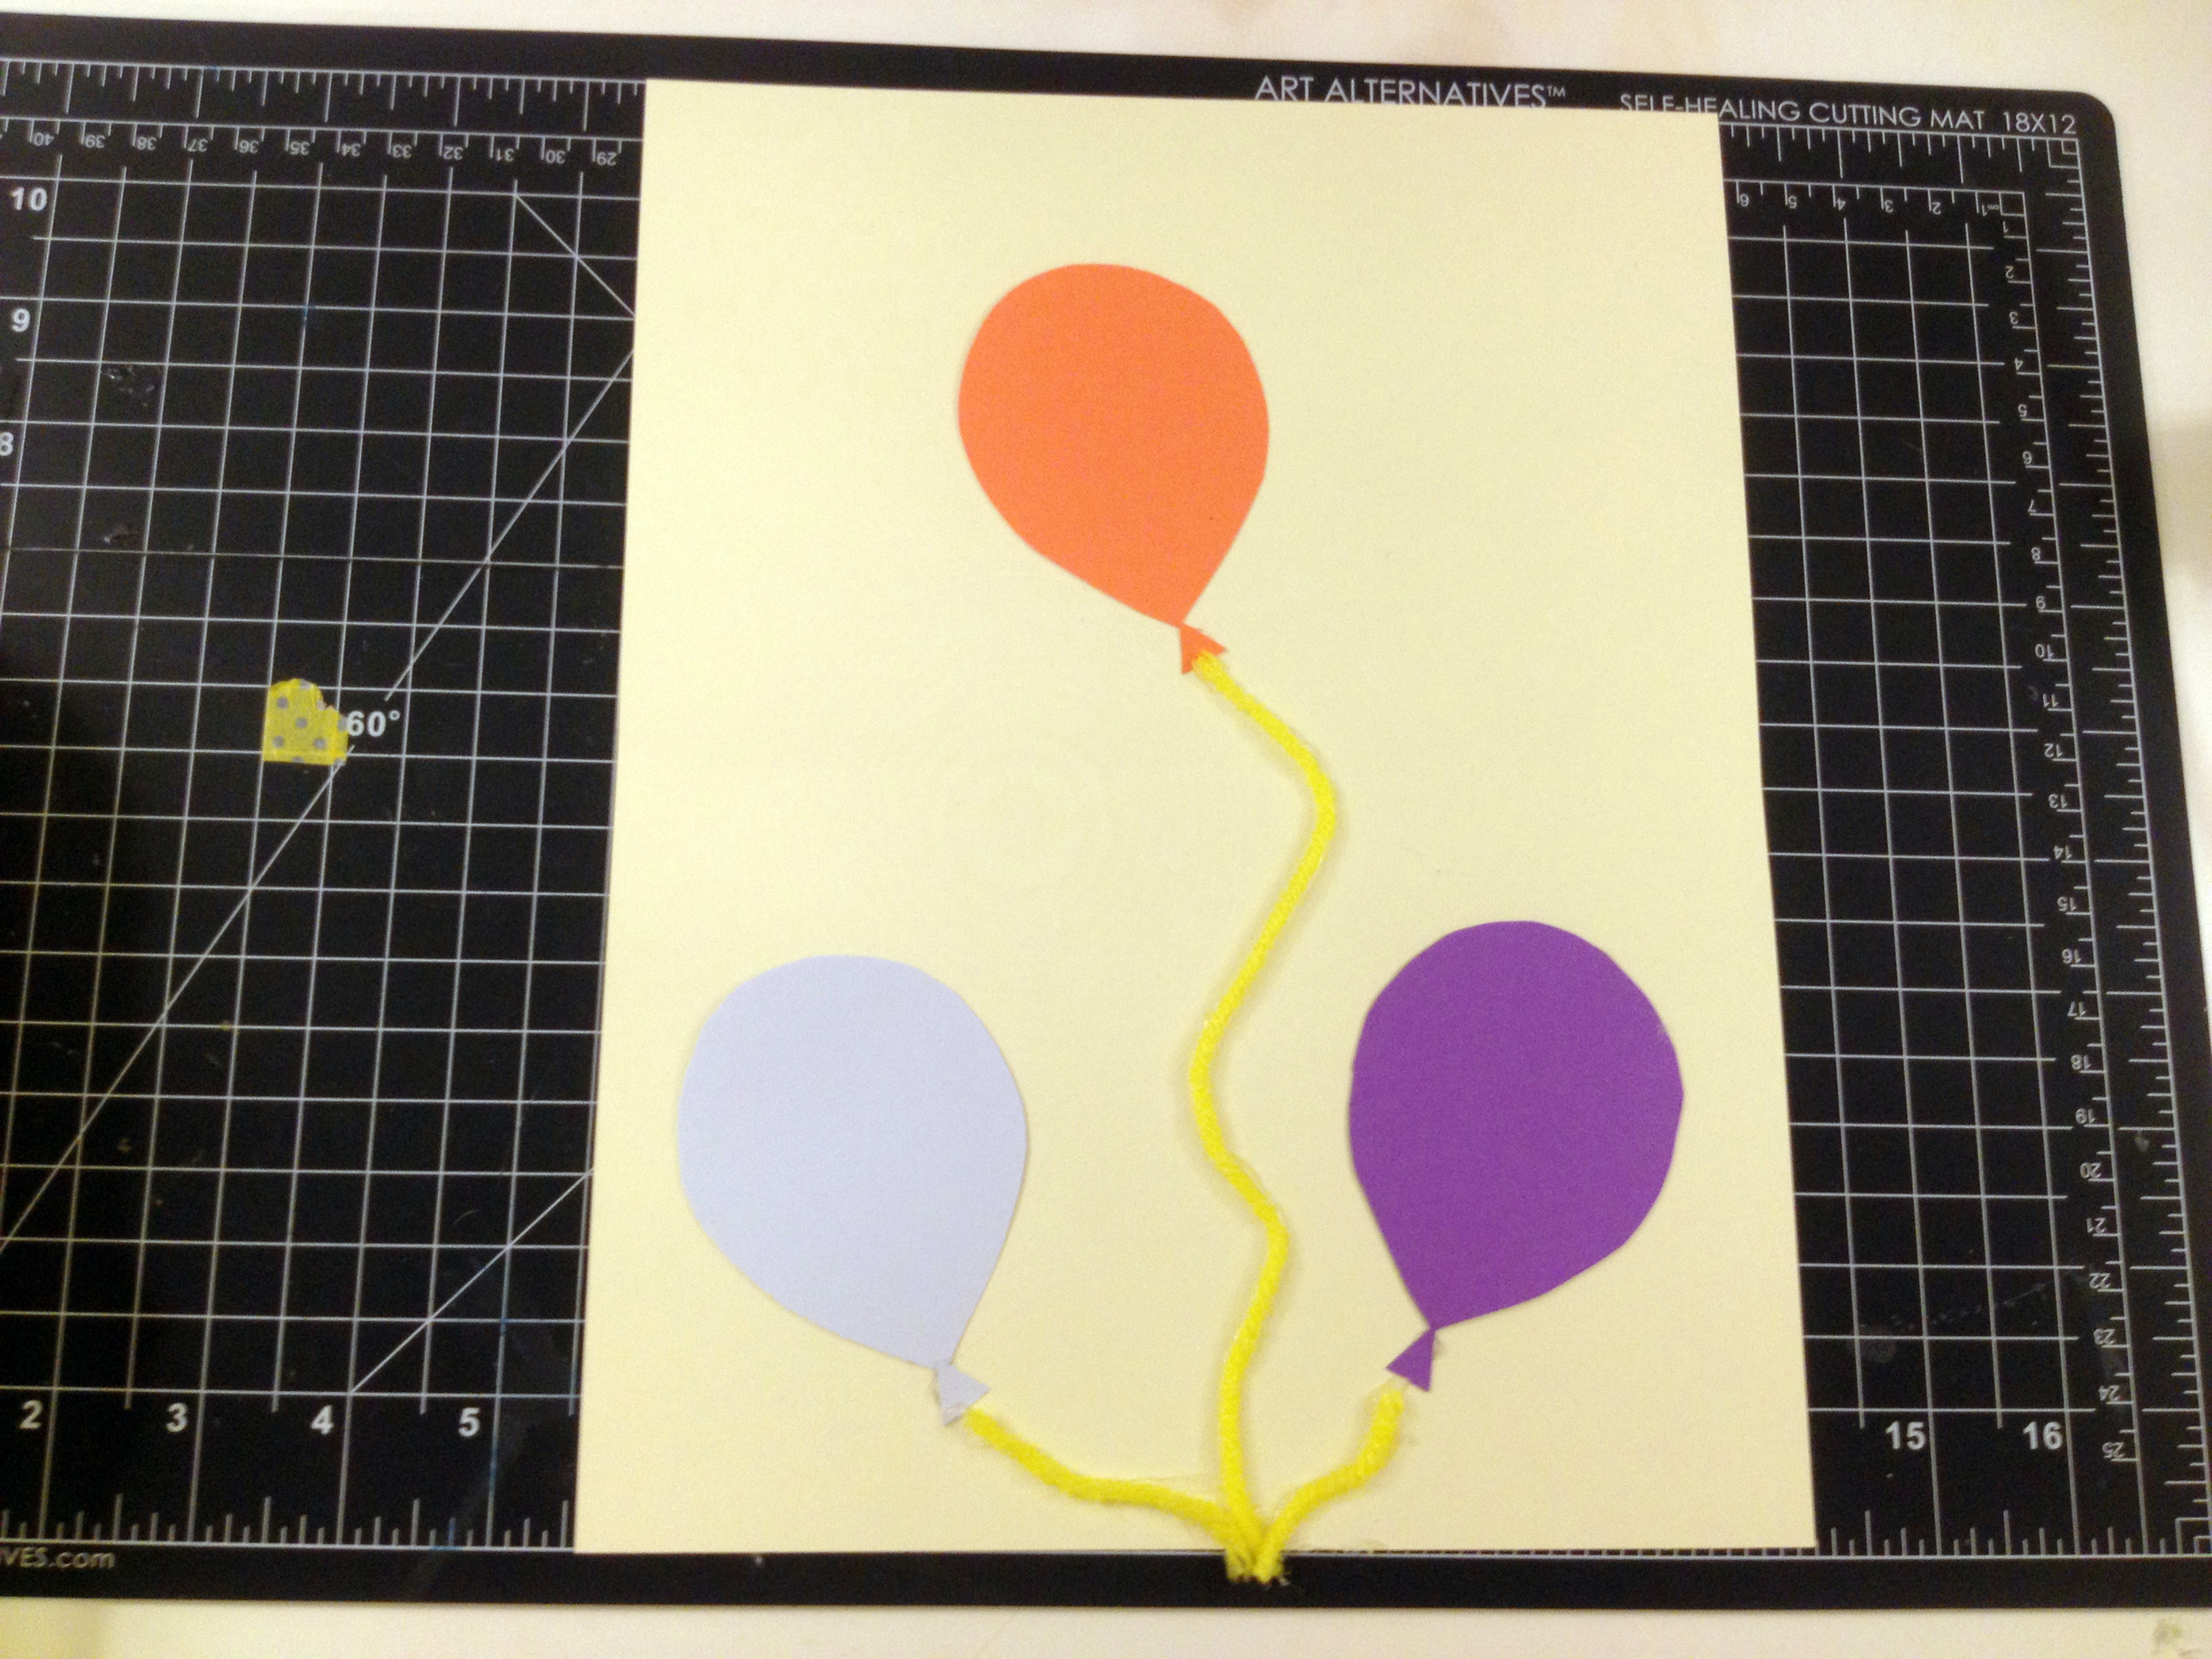
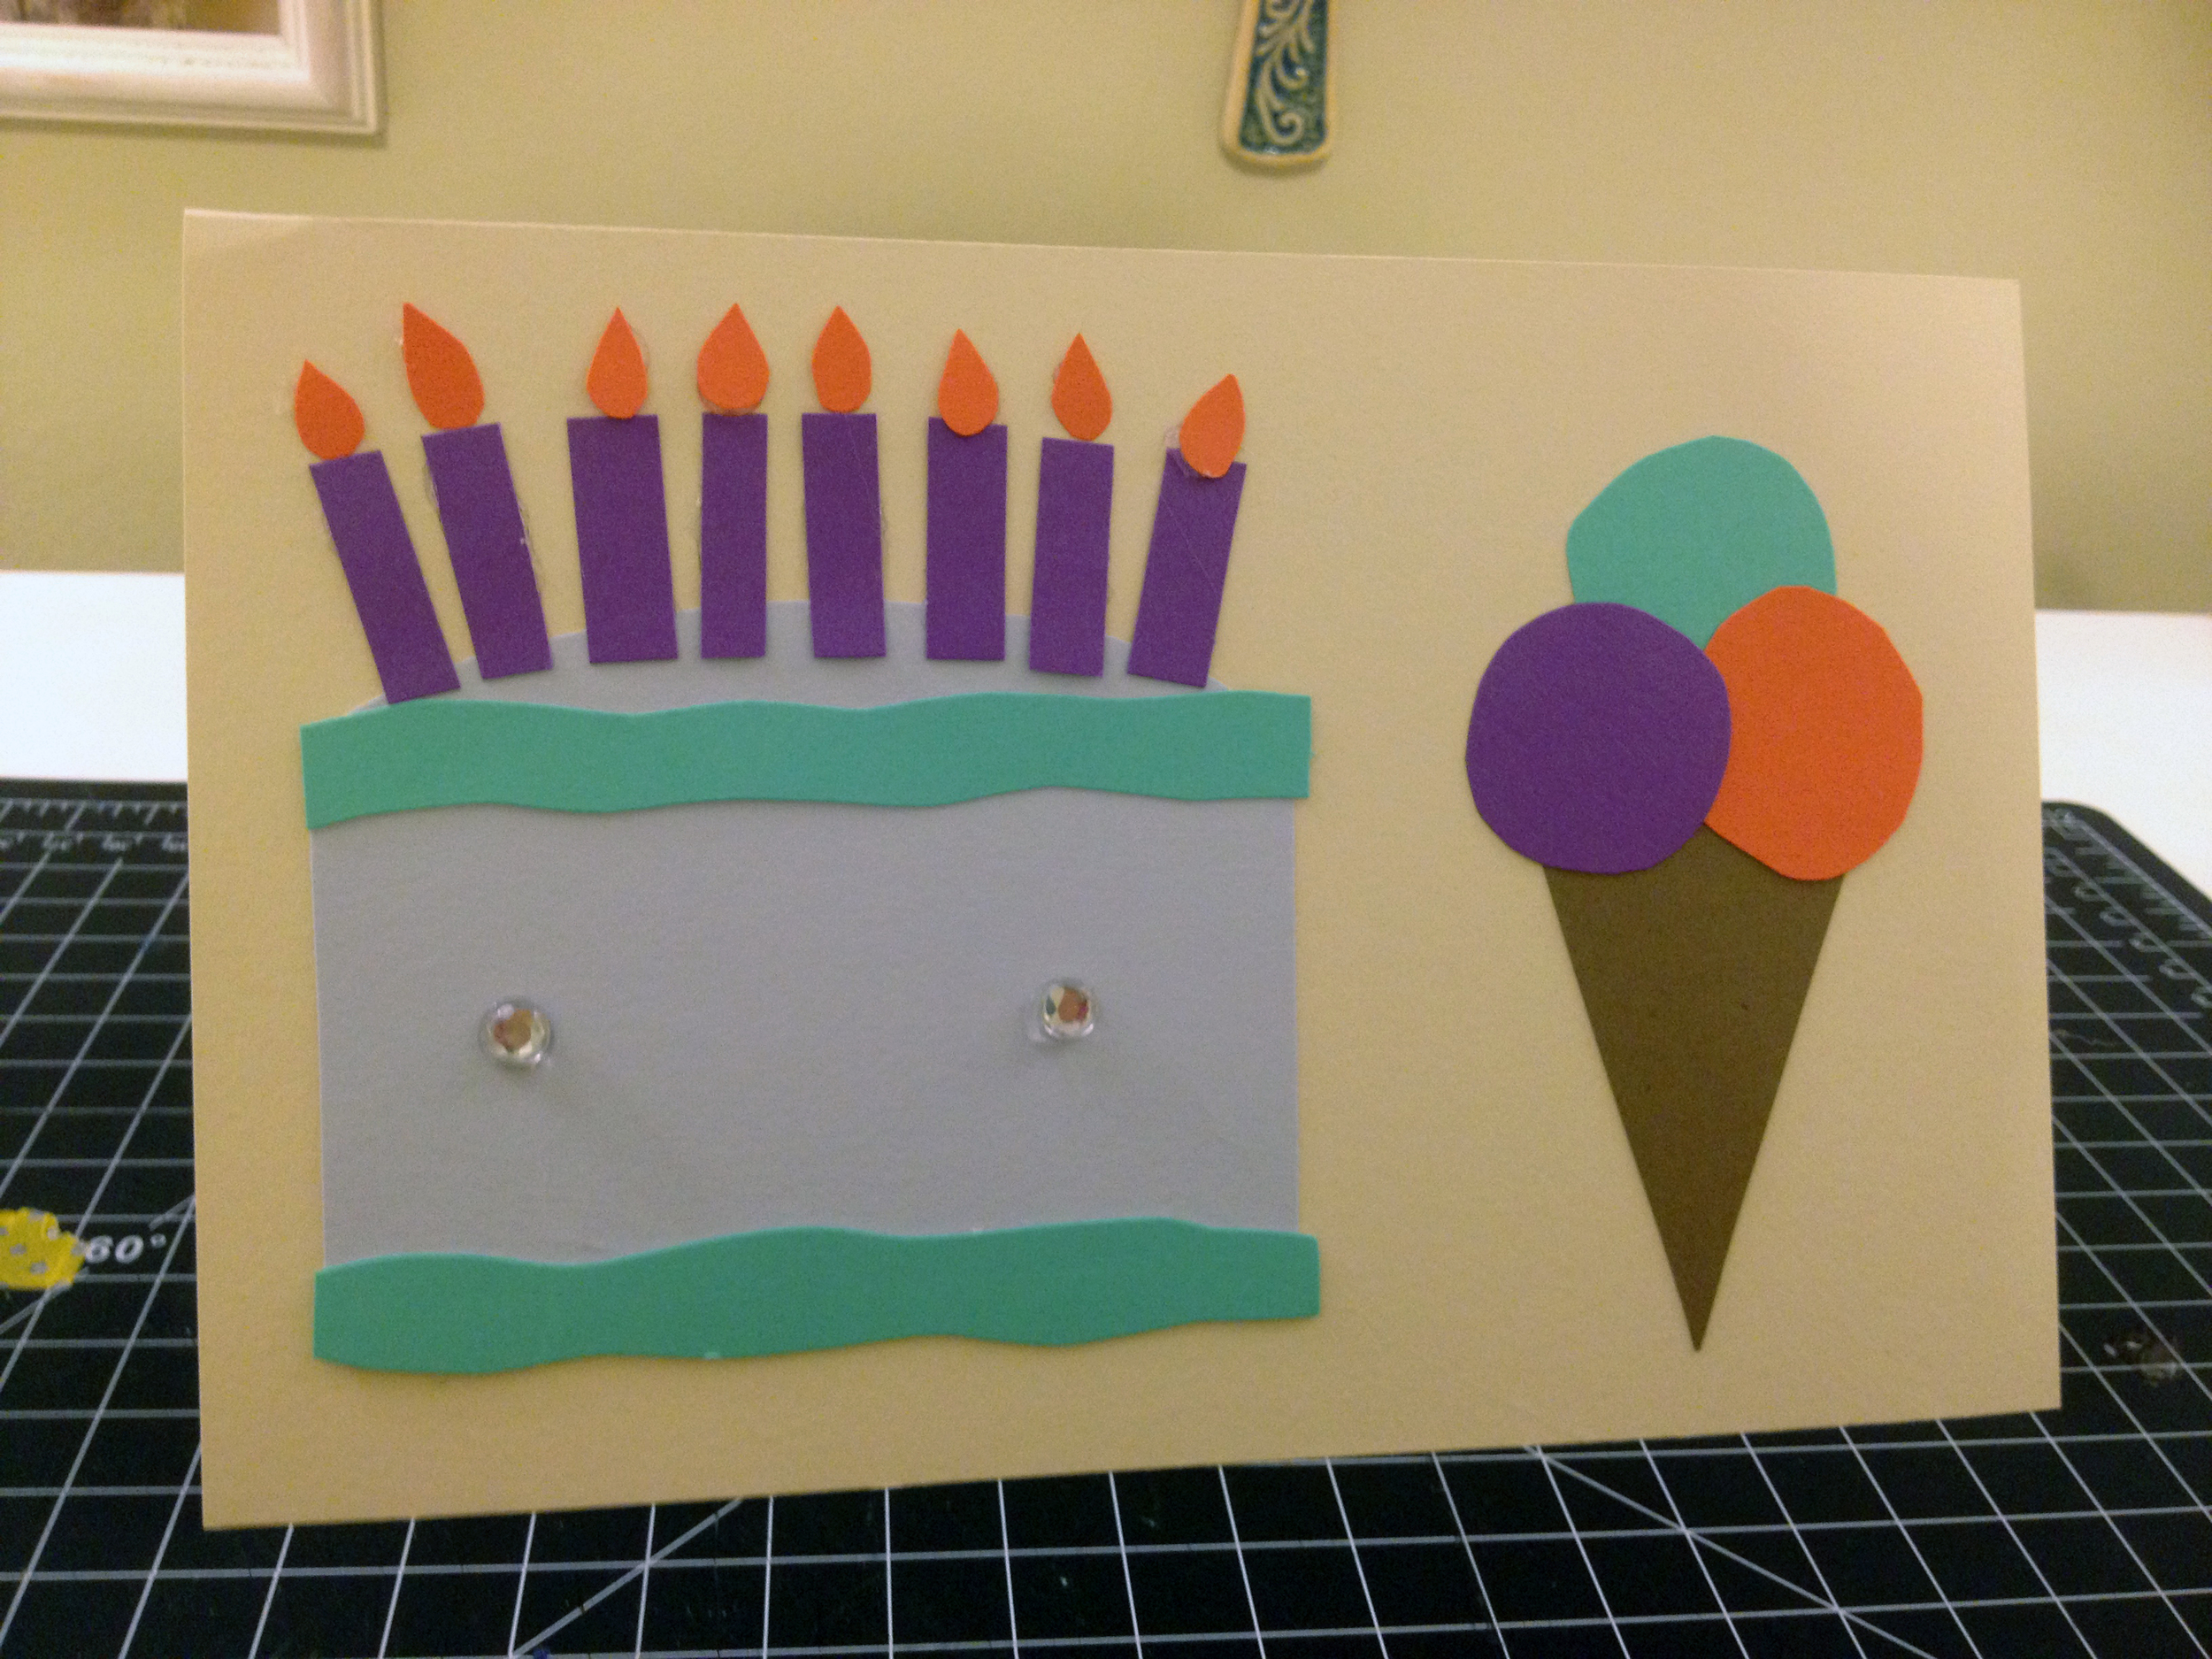
I started by cutting out the shapes. I cut out a cake (a rectangle with one rounded side - color 1), two pieces of icing (long, skinny rectangles with wavy sides - color 2), three balls of ice cream (medium-sized circles - I cut one out, and then traced around it to create the others - color 2, 3 and 4), one ice cream cone (cone shape, of course! - color 5), three balloons (teardrops - color 1, 3 and 4), three balloon ends (tiny triangles - color 1, 3 and 4), 8 candles (tiny rectangles - color 3) and 8 flames (tiny teardrops - color 4).
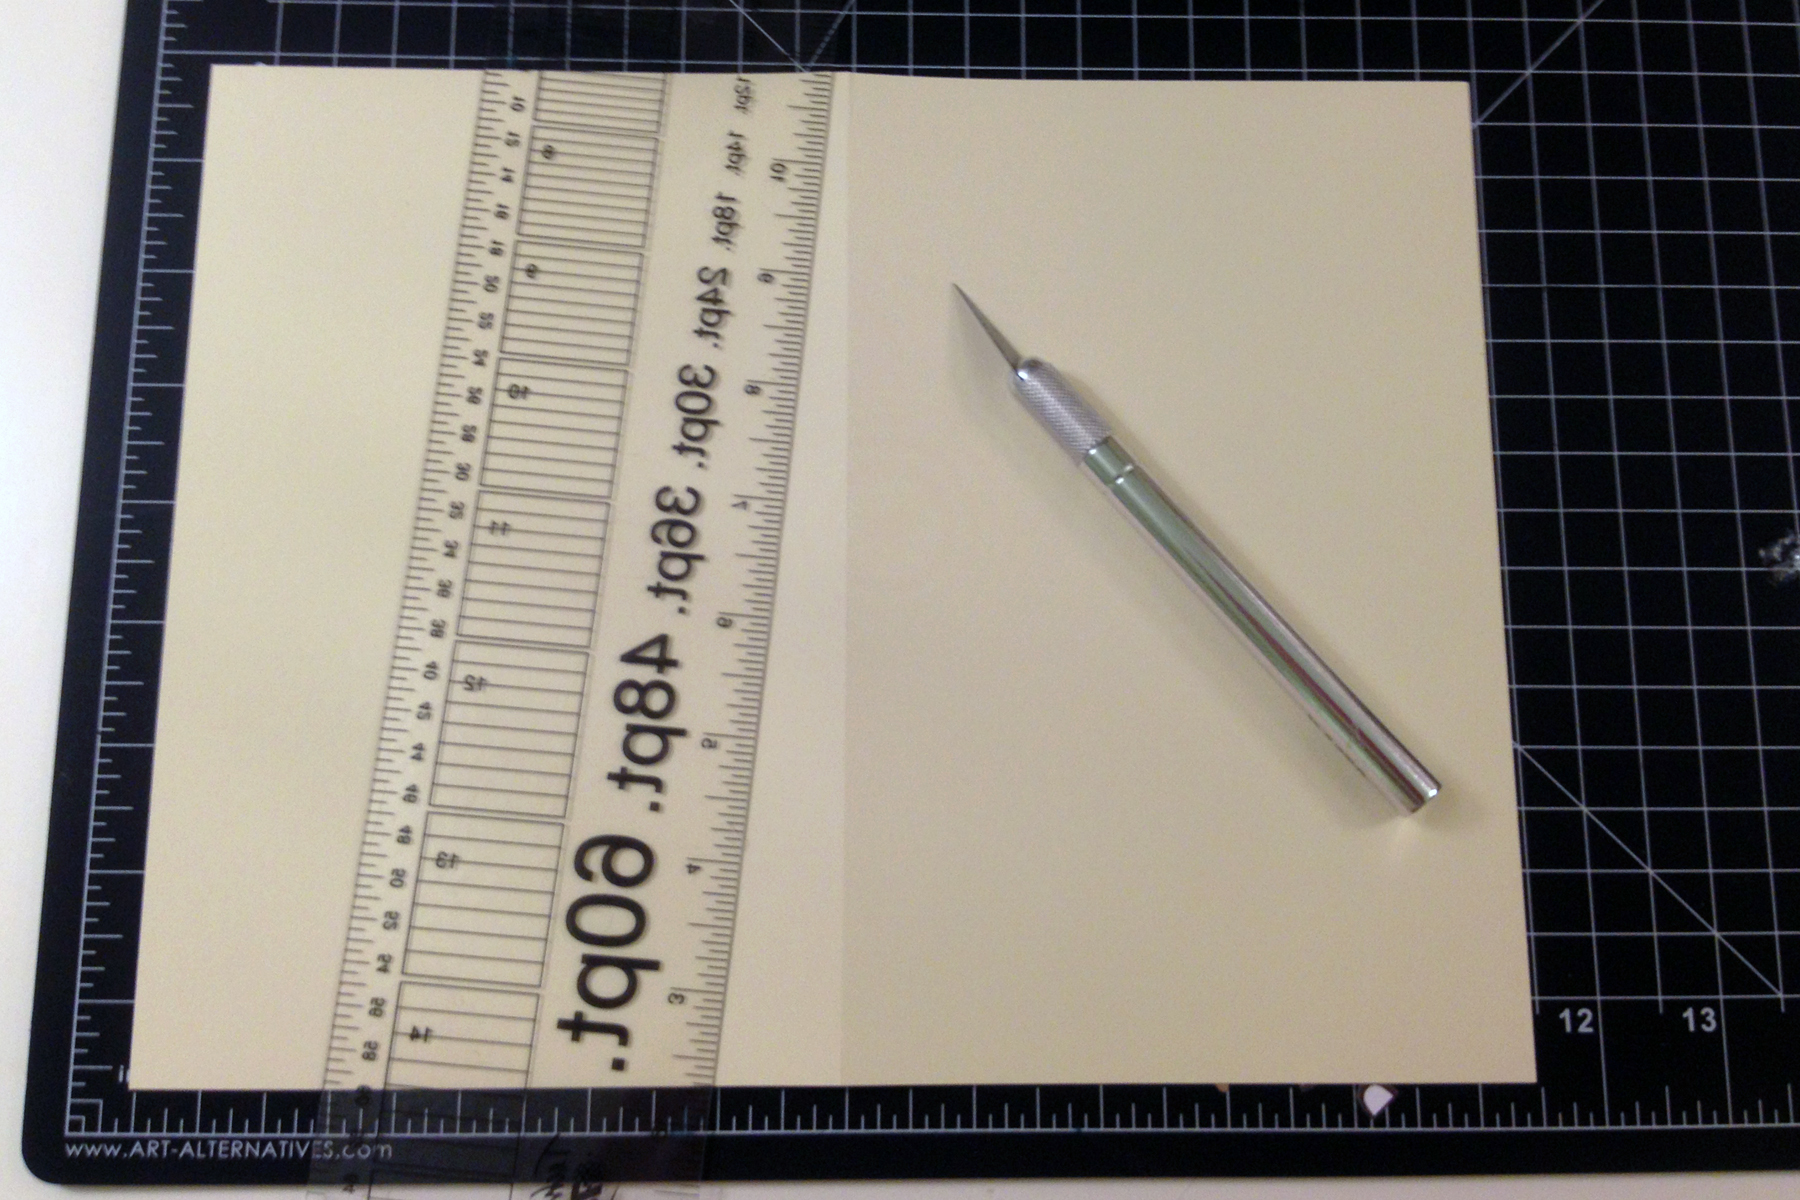
Use your mat to find the center of your card base (color 6 - 5.5 " for this card), and then score it by running the knife lightly down the center once or twice. Fold in half.
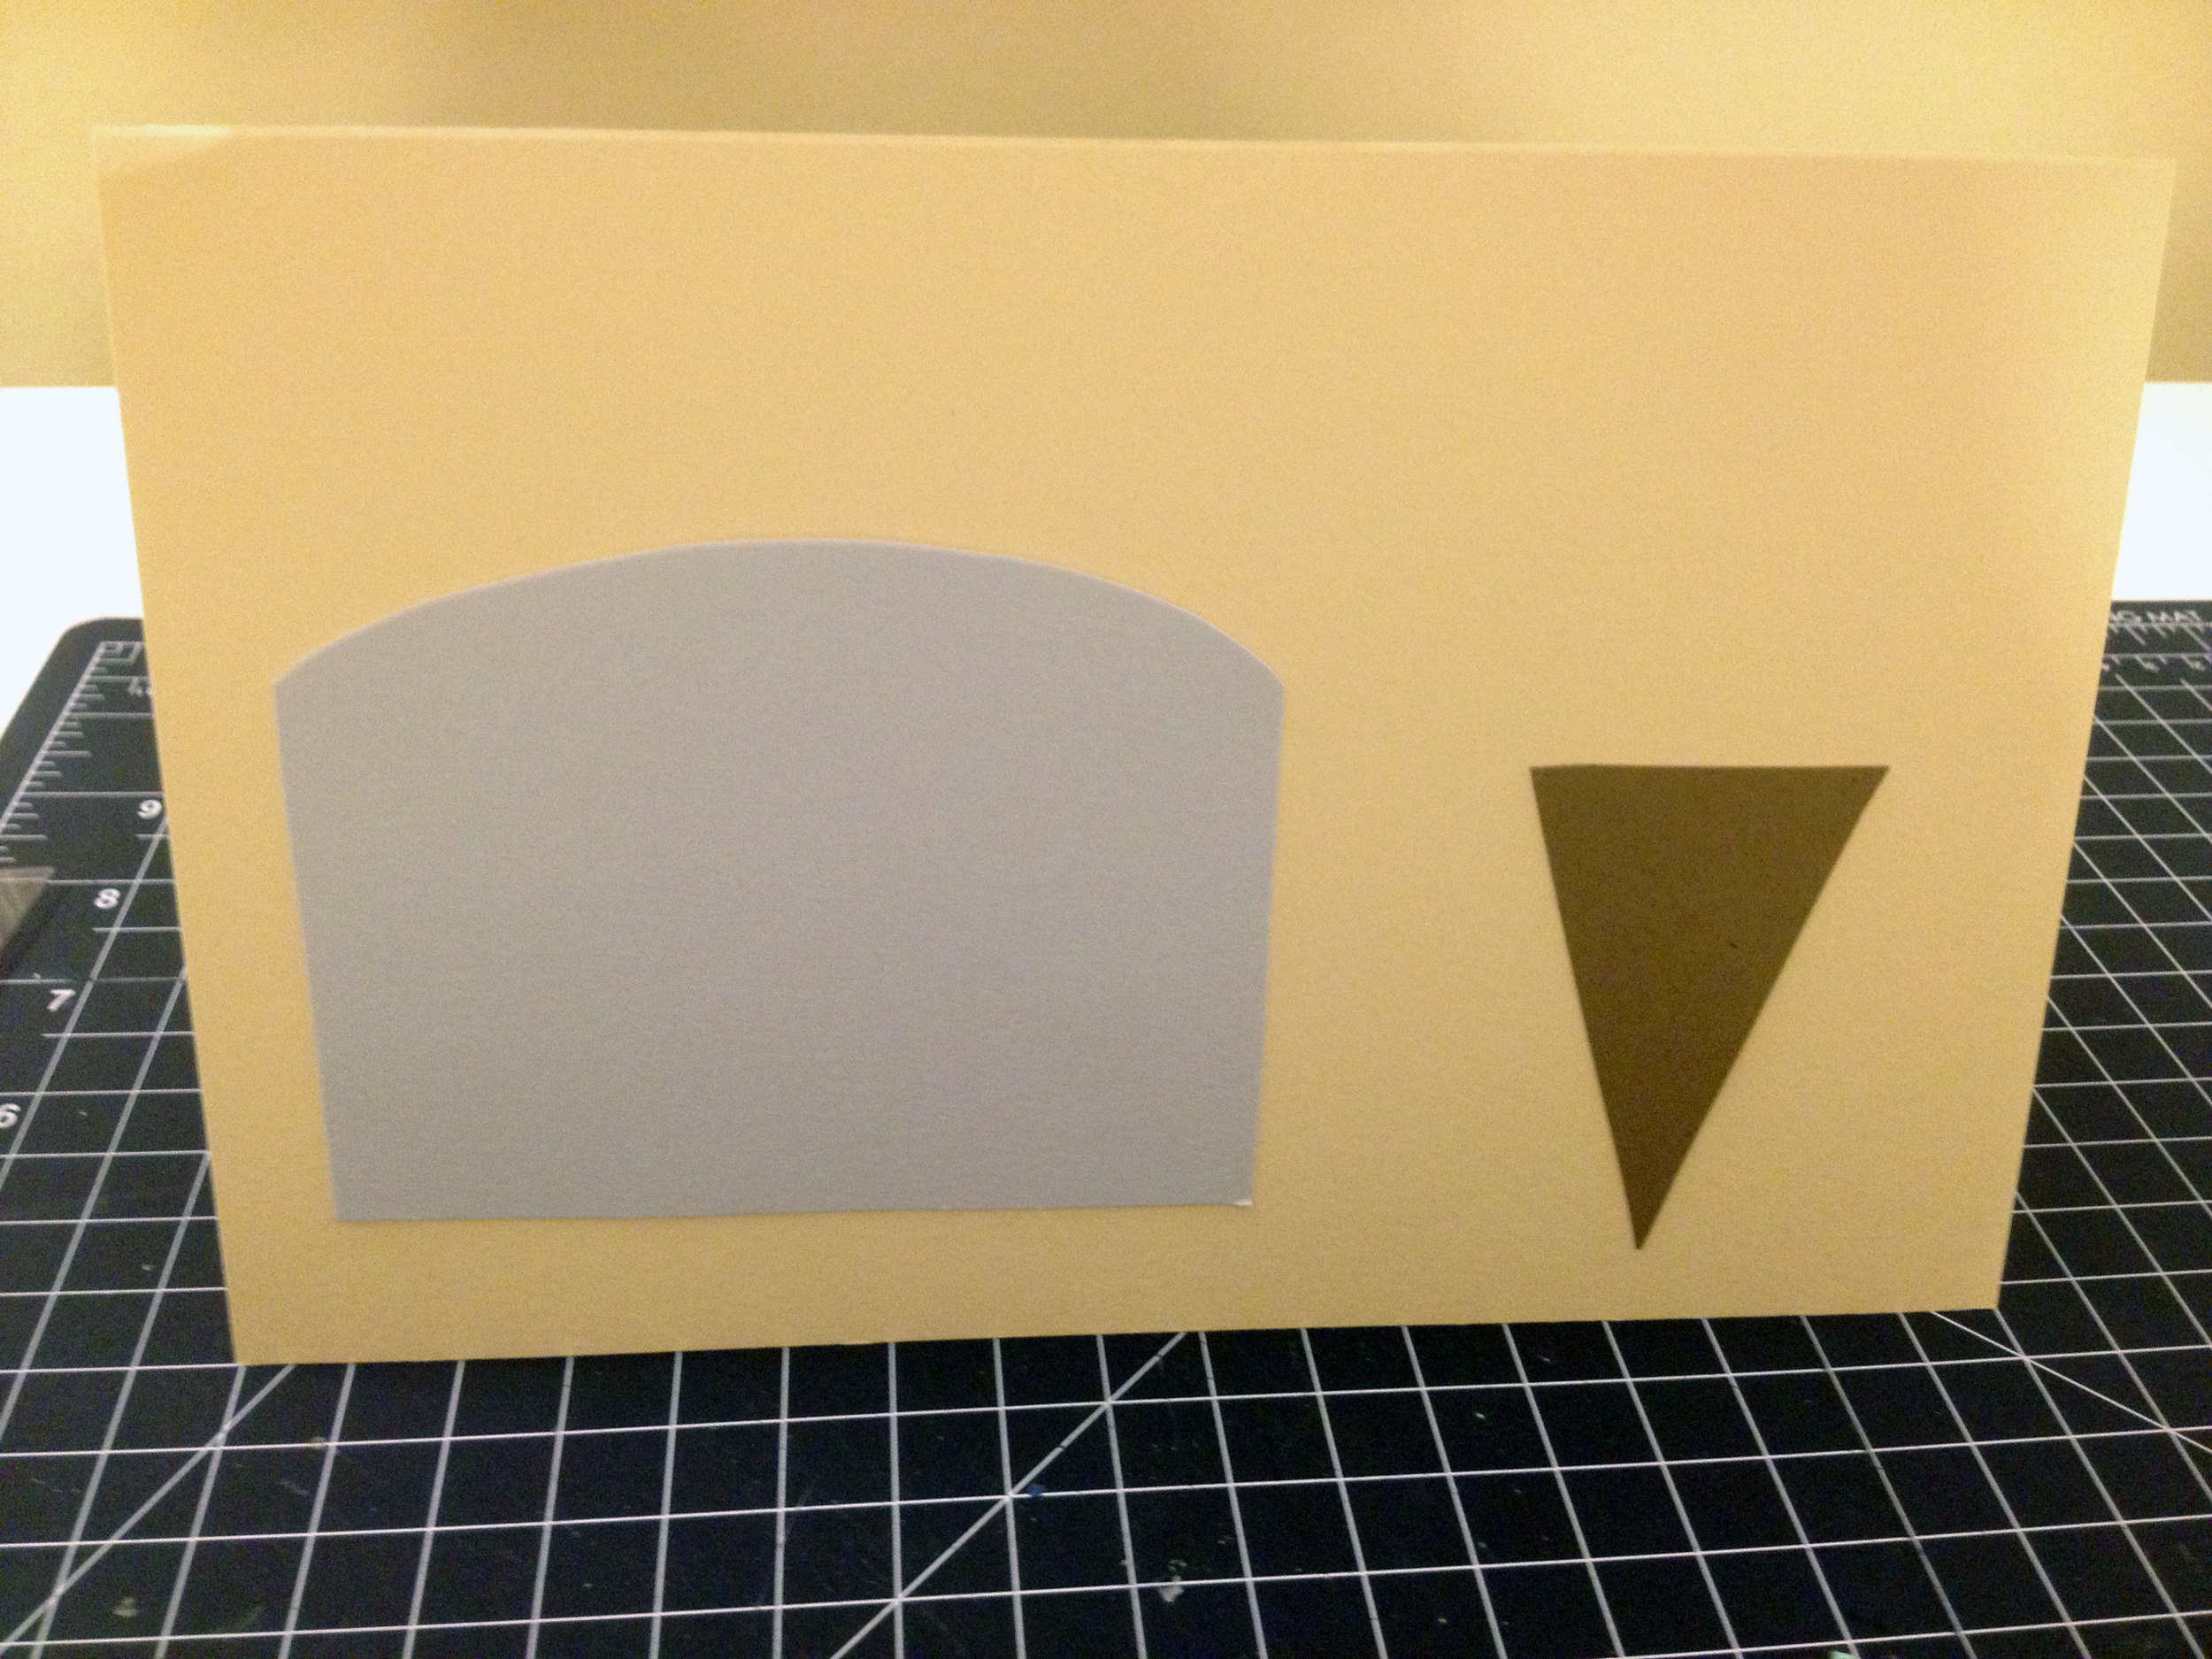
Glue your cake and cone to the front of the card.
Add your icing, ice cream, candles and flames to the front of the card.

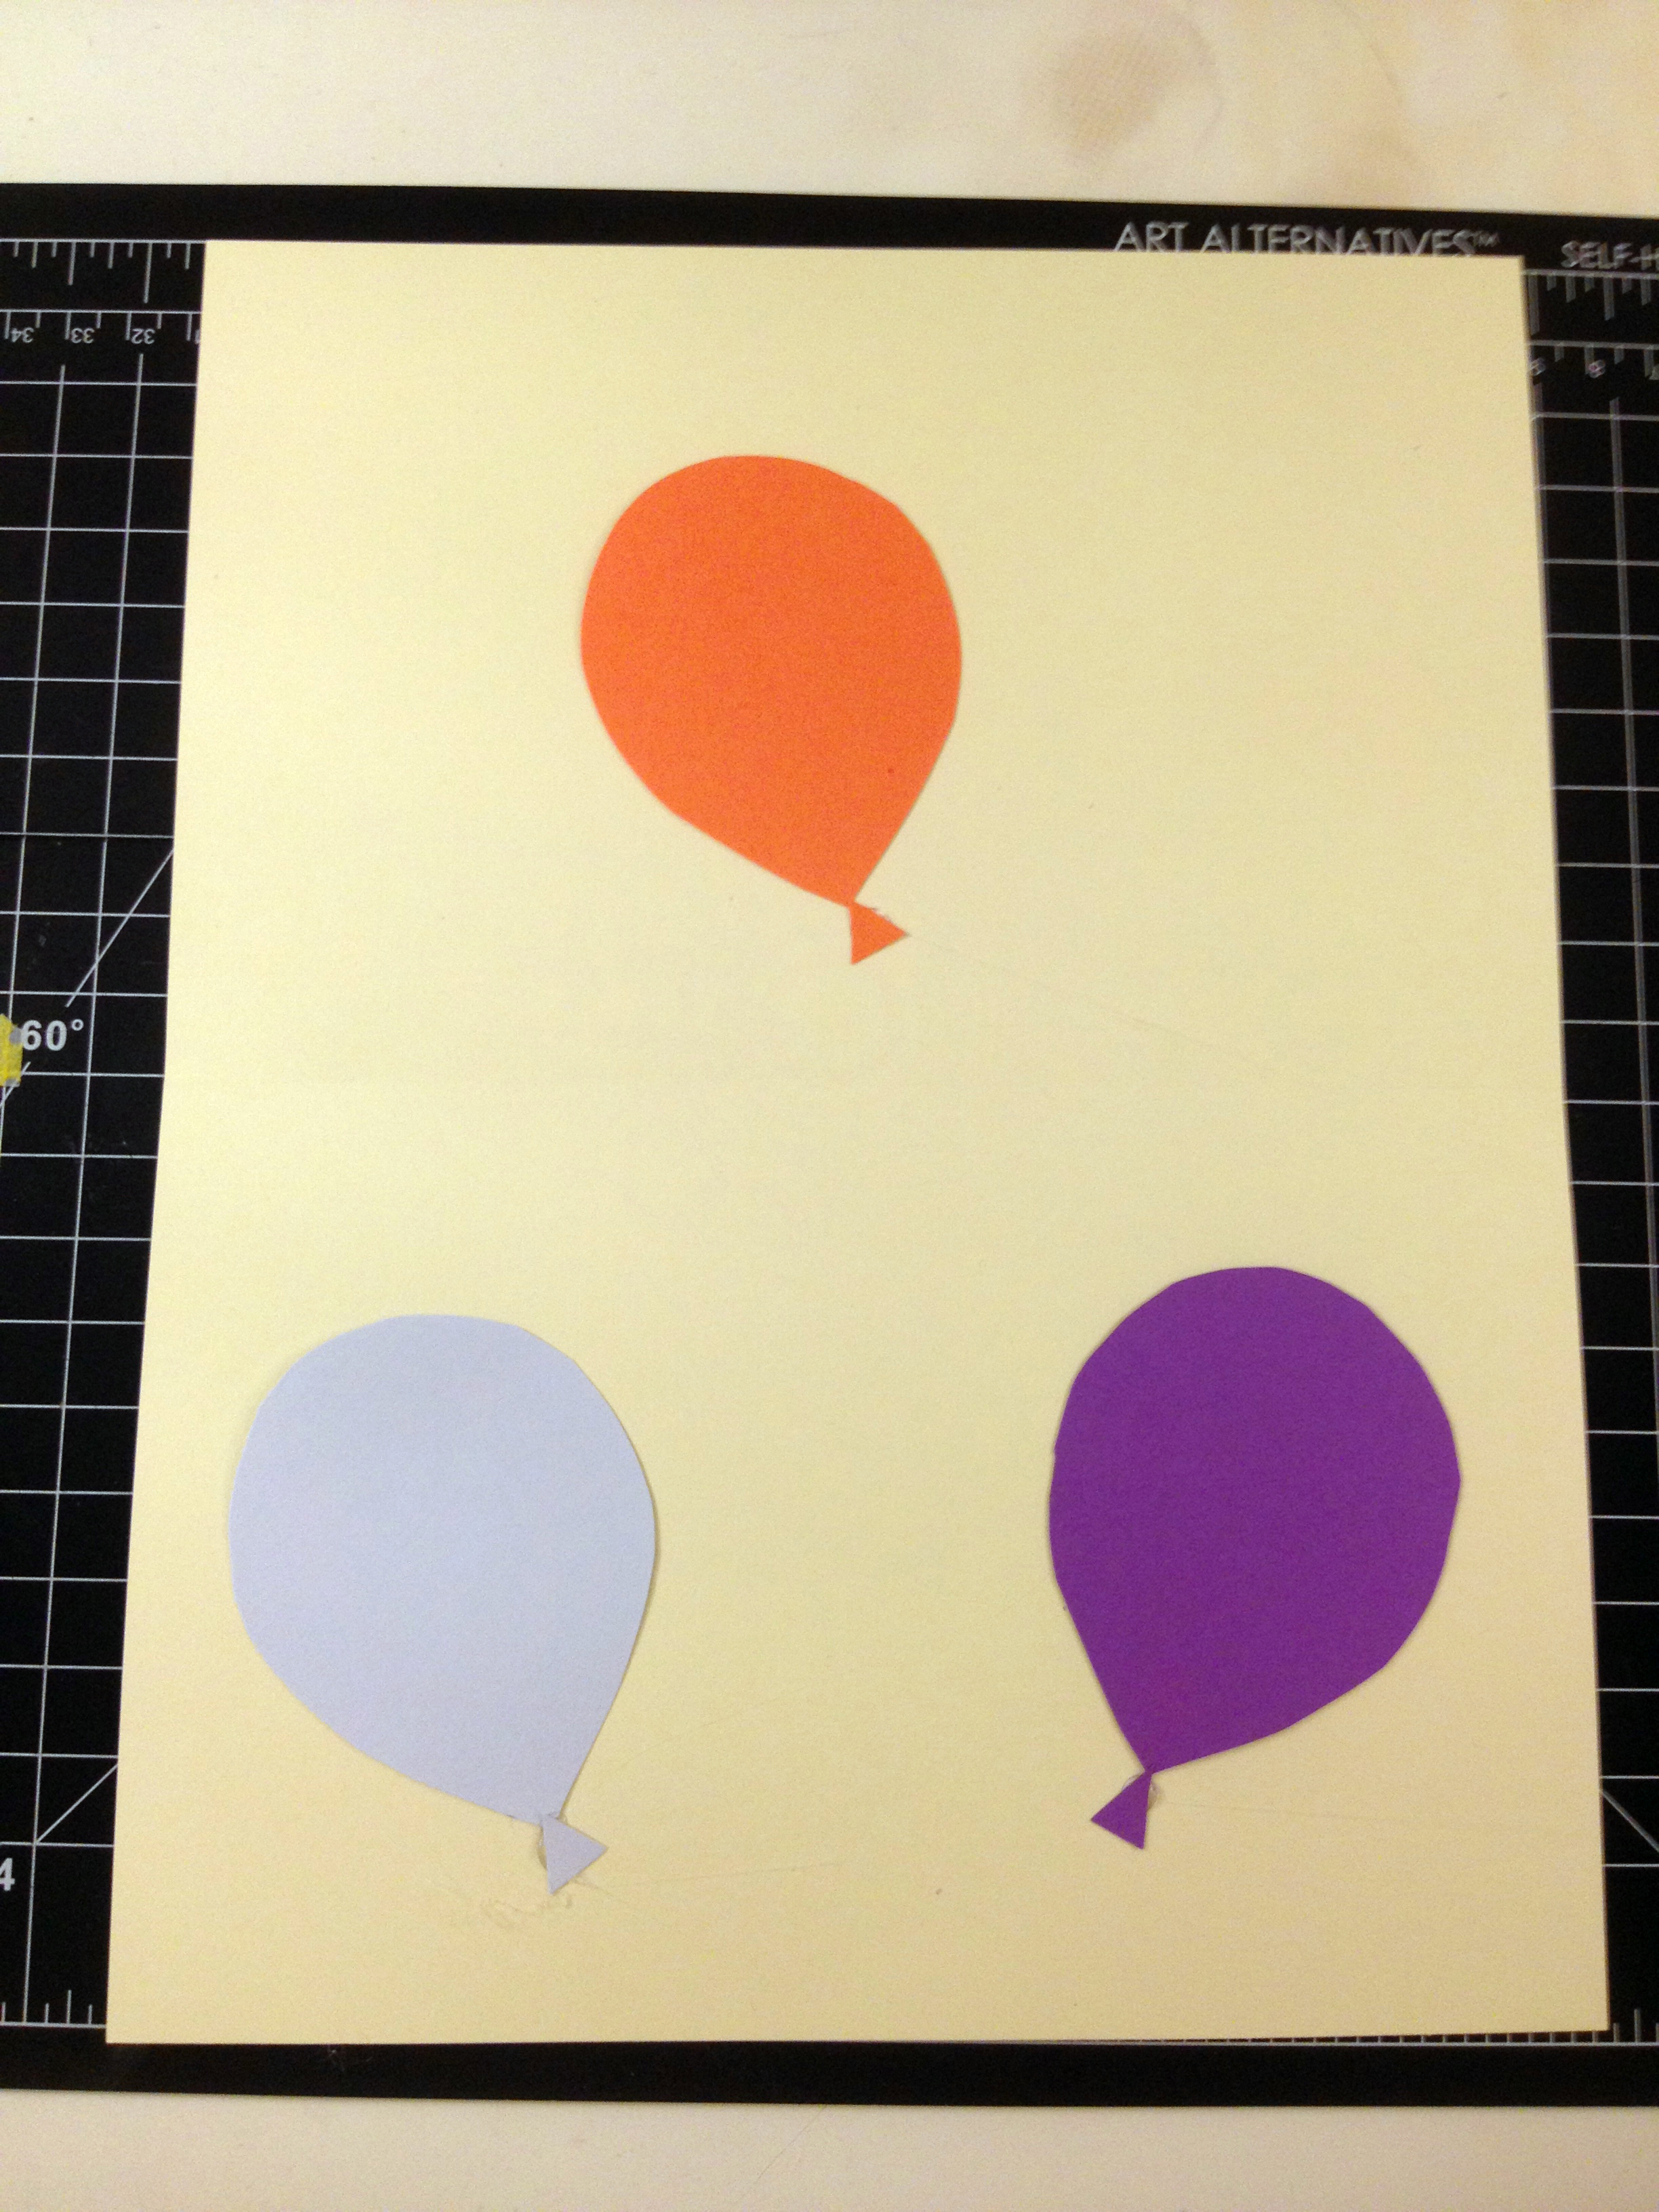
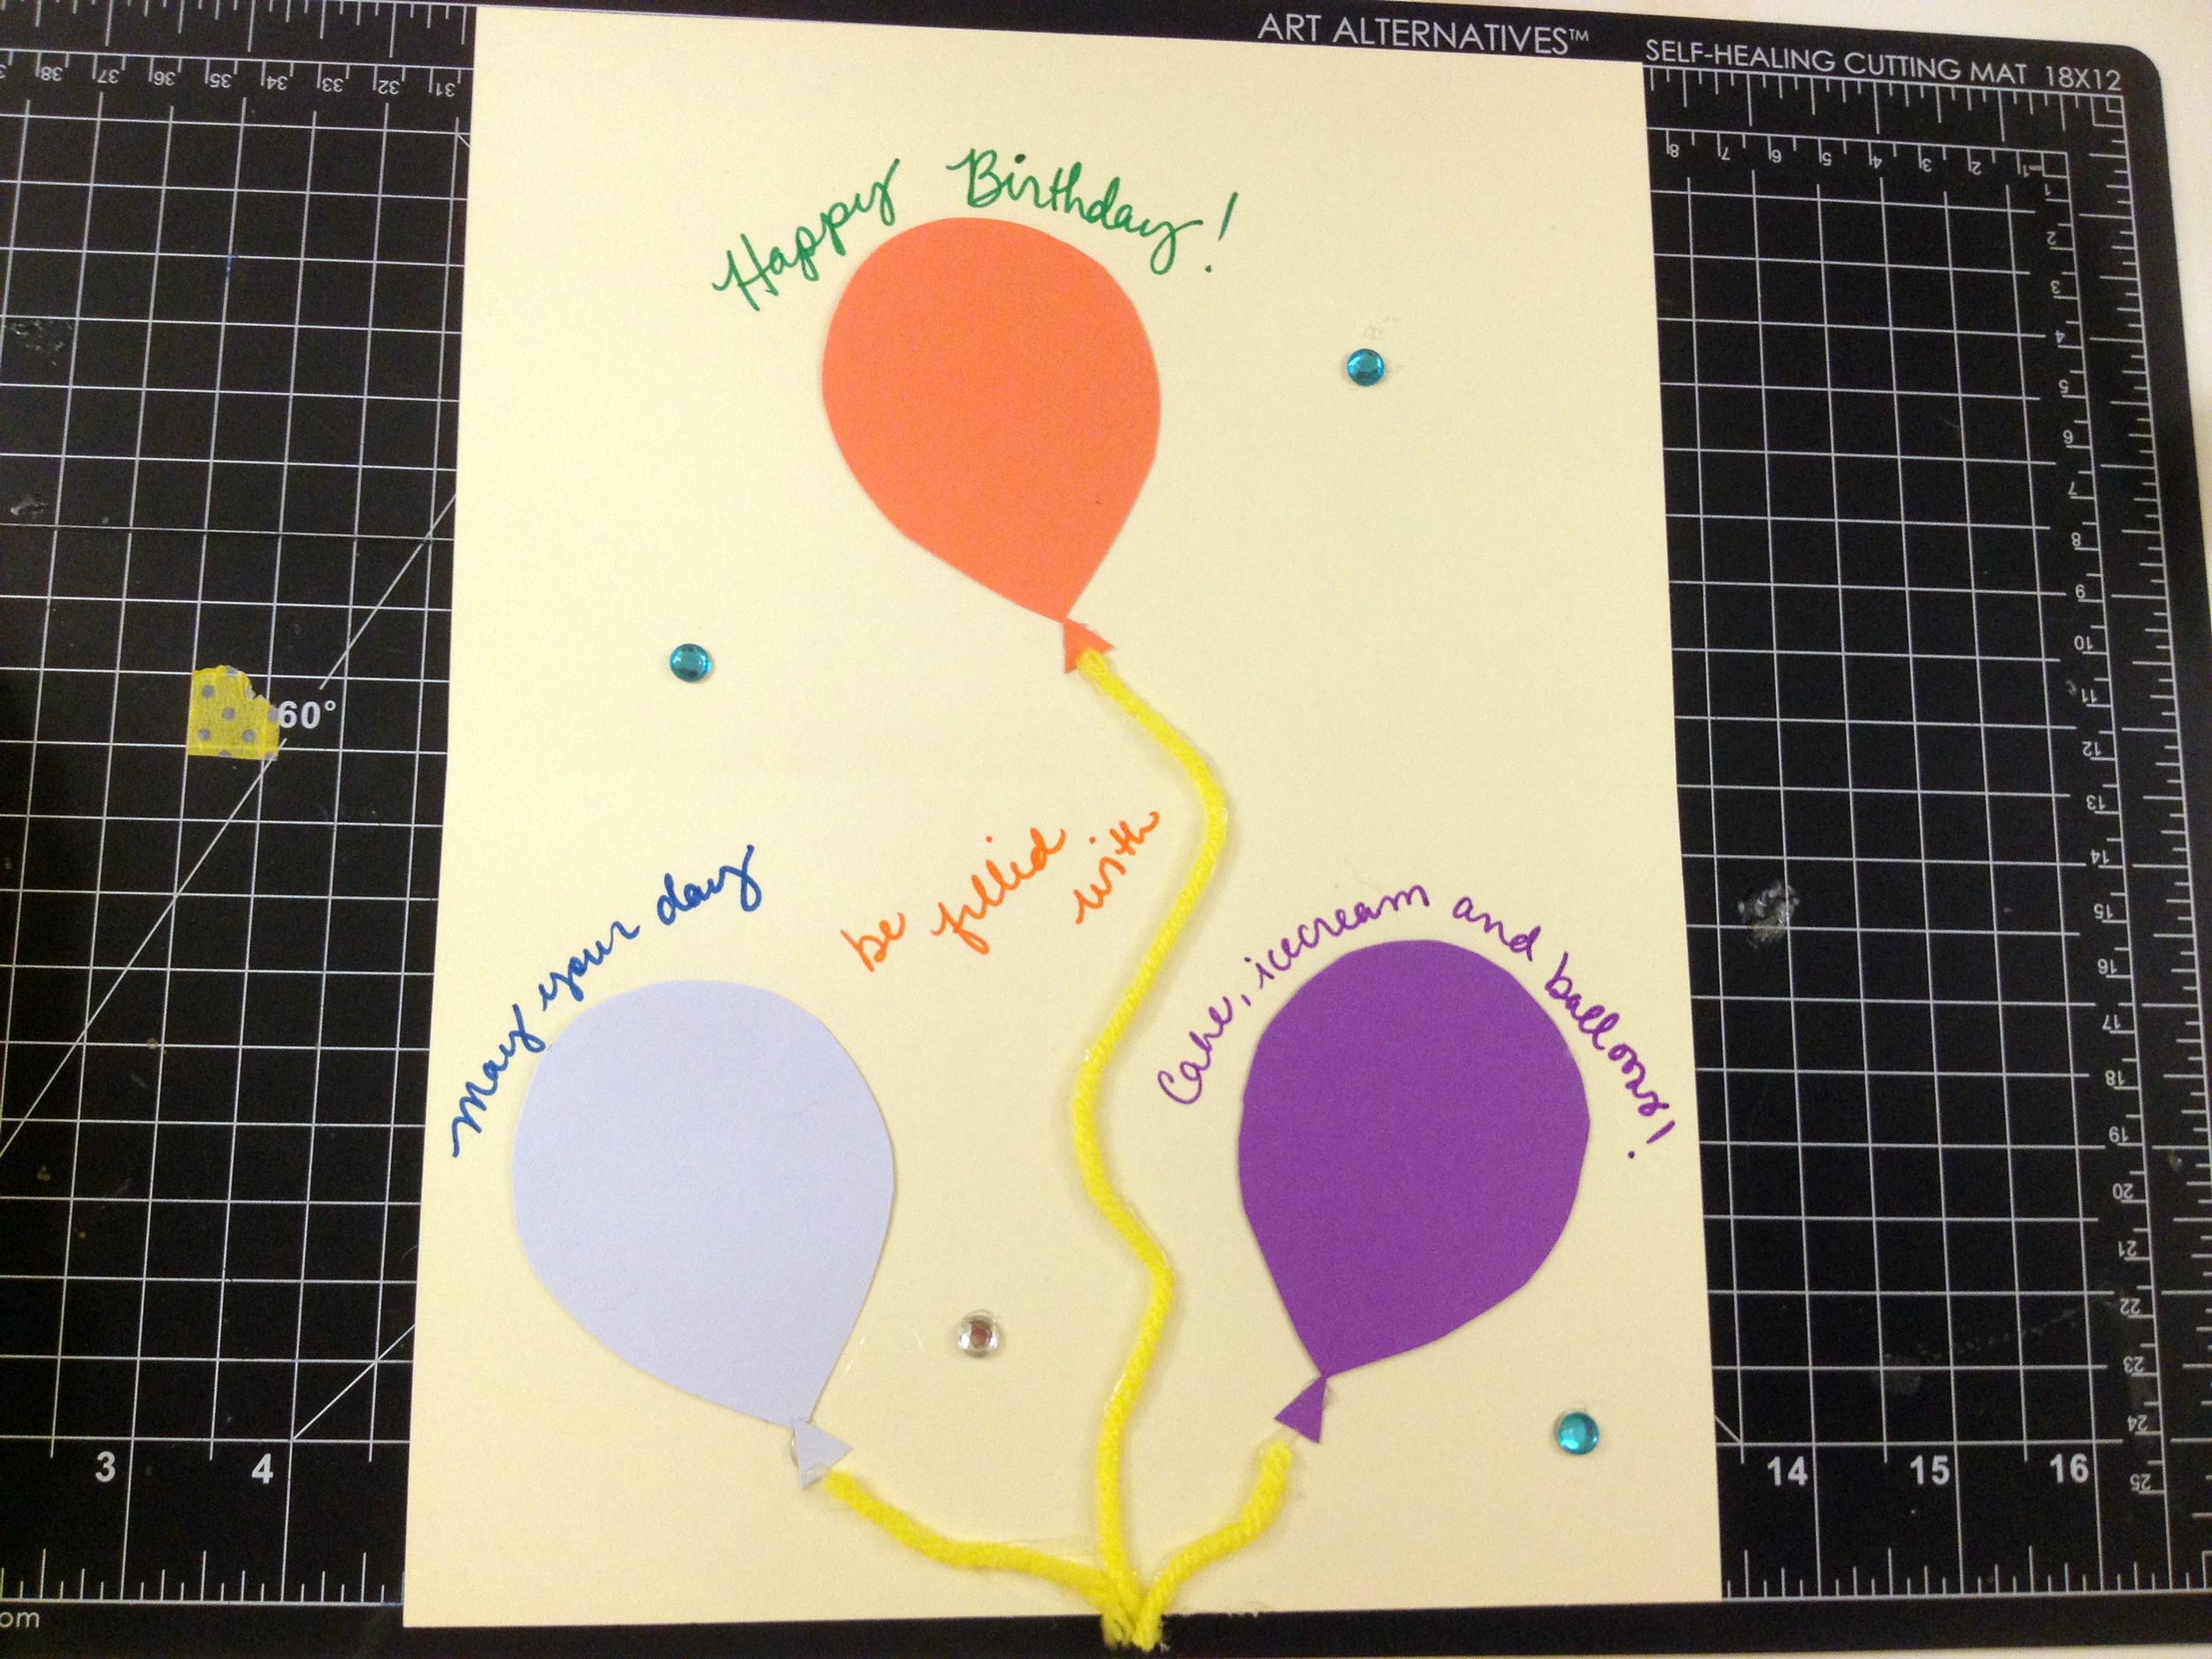
On the inside of the card, glue down your balloons and ends.
Using your glue gun, carefully attach the yarn just below each balloon.
Add your message and some rhinestones for sparkle. You could also add glitter glue to each balloon to make your balloons shiny.
To finish out the card, add a few rhinestones to the center of the cake. If you have chip board or sticker letters and/or numbers, you could also add the person's name, birth date or age to the cake. Again, if you like the shiny look, you could also add some glitter glue to the flames.
Here's a personalized version of this card that I made for my sister's birthday earlier this week.
As you can tell, I like shiny!

If a parent cut out the shapes, scored the card and replaced the hot glue with Elmer's glue, a child could definitely assemble this card.
Happy card making!