Recipe Box

in the kitchen: baked brie in puff pastry

photo 3.JPG

Today we have another indulgent recipe to share. This was our Valentine's weekend treat. We don't eat cheese very often, but when we do eat cheese, we eat really good cheese. You might remember that we have the same philosophy about good bread

We started with this recipe for puff pastry. We cut the recipe in half, and used Earth Balance butter, because that's what we had on-hand. The President brie, Empire apples and pecans came from Costco -- they are so much more affordable there!

To assemble, we simply rolled out the puff pastry, placed the brie in the center, folded the pastry around it and then placed it on a baking sheet. We baked it on 350 for 20-25 minutes. You want the cheese to be slightly melty when you cut it, and you want the pastry to be just golden brown. While the brie bakes, we cut an apple and crumbled some pecans. Once the pastry came out of the oven, we placed the brie in the center of a platter or arranged the apples and pecans around it. Finally we drizzled some honey on top, and we served the brie with these crackers. Yeah, we have a thing for homemade goodies. It's so much better than store-bought. 

In our case, we nibbled on the baked brie in puff pastry all weekend, but this recipe would also be great for a party. If you want to do what we did, you can reheat the brie, but you'll need to watch it more closely the second time around or it'll ooze out all over the baking sheet....Make sure you have those crackers and apple slices handy.

make a heart-shaped pizza

Why don't you make a heart-shaped pizza for Valentine's Day? It's a simple, inexpensive gesture, but the results are sure to make you and your special someone smile. Heart-shaped pizzas also work great for Valentine's Day parties with kids, extended family and friends. You can make several -- one to suit every person's pizza taste. The more hearts, the better!

To make the heart shape, simply roll out your preferred pizza dough on a lightly floured pastry mat and then use a butter knife or pizza cutter to cut out your heart shape. My pastry mat is designed for cutting, but be careful not to cut your mat or surface!

You can lightly trace your heart before cutting all the way through if you aren't sure if you'll be happy with your first attempt at a heart shape. Then add your favorite sauce and pizza toppings and place in the oven on 400 degrees until the dough and toppings are golden brown. Enjoy your heart pizzas with your loved ones.

Happy Valentine's Day!

IMG_1947.JPG
IMG_1951.JPG

in the kitchen: herbed focaccia bread

photo.JPG

On Friday afternoon, I decided to make some homemade bread. In the past I've made whole wheat baguettes, but this time I wanted something a little more special, so I did a quick Pinterest search and found this recipe. Unfortunately our recent single digit temperatures have all but killed our rosemary plant, so I altered the recipe a bit. The resulting bread was so delicious that I had to share it here. It uses way too much olive oil and white flour to be healthy, but if you're going to eat bread, my thought is that it should be really good bread. This was really good bread. Who needs fancy restaurants, Whole Foods or Fresh Market when you have this?!? Yum.

Herbed focaccia bread adapted by Gerald & Joan:

-5 cups of white flour
-Approximately 2 cups of warm water
-2 1/4 tsp of yeast or one yeast packet
-1/4 cup of good olive oil, plus more for topping
-2 1/2 tsp of sea salt
-Fresh or dried rosemary, basil and oregano. I used fresh (okay, slightly freeze-dried!) rosemary and dried basil and oregano
-Dried garlic powder and red pepper flakes
-Pepper and sea salt

The key to this recipe is a stand mixer. They are ridiculously expensive, but they make baking so easy. I was lucky enough to inherit mine, and it has been a lifesaver for baking, especially bread making. I highly recommend them. 

I placed the yeast and the warm water in the bowl of the stand mixer, stirred them together and then waited until the mixture was creamy. I gathered my other ingredients together while I waited, so I let about 10 minutes pass before I returned to the mixer. I attached the bread paddle, and then I added the flour, olive oil and salt to the yeast. I set the mixer on medium speed until the mixture began to look like sticky dough. At first, I set the speed too high and flour flew everywhere. Lesson learned!

Once the dough had started to form, I turned the mixer off, switched out the paddle for the dough hook, and then turned the mixer on medium-high speed. Once the dough had formed a real dough ball (so cool!), I turned the mixer off and placed the dough ball on a slightly floured surface. I kneaded the dough a few times until it was covered in the flour, and then placed it in a bowl that had been drizzled with olive oil. I rolled the dough around the bowl until it was coated in the oil, and then I covered the bowl with a towel and let the dough rise in a warm room for two hours. When the timer went off, I oiled a 13 x 9 Pyrex baking dish and pressed the dough into the dish with my clean fingers. I covered the dish with the towel again and let it rise for another hour. In the meantime, I washed the fresh rosemary and created my herb mixture. I didn't measure out my herbs, but I knew I wanted a generous topping for my bread. I mixed together basil, oregano, rosemary, red pepper flakes, sea salt, pepper and garlic powder. Then I added olive oil until the herbs were covered and stirred the mixture. Once my timer went off, I set the oven to 425 and then used my clean fingers to punch the dough down again. Next I drizzled the oil and herb mixture over the top of the bread until it was completely covered. If it looks like you have too much oil on your bread, don't worry -- it cooks into the dough and makes it very moist! I cooked my bread for 22 minutes, and it didn't need a minute more. The herbs were a little crispy but still very fragrant. Next time I'll set my timer for 17 minutes and then watch the bread more closely so the herbs don't over cook. The goal is a slightly golden bread. Second lesson learned!

This bread is not healthy. It is rich and indulgent, but it would make a really good valentine treat because it pairs really well with romantic foods like pasta, marinara sauce, cheese or a salad. We enjoyed it all weekend long with gnocchi, and as a snack and even as panini bread! It is definitely a special treat, but we all need special treats in our lives from time to time. Enjoy!

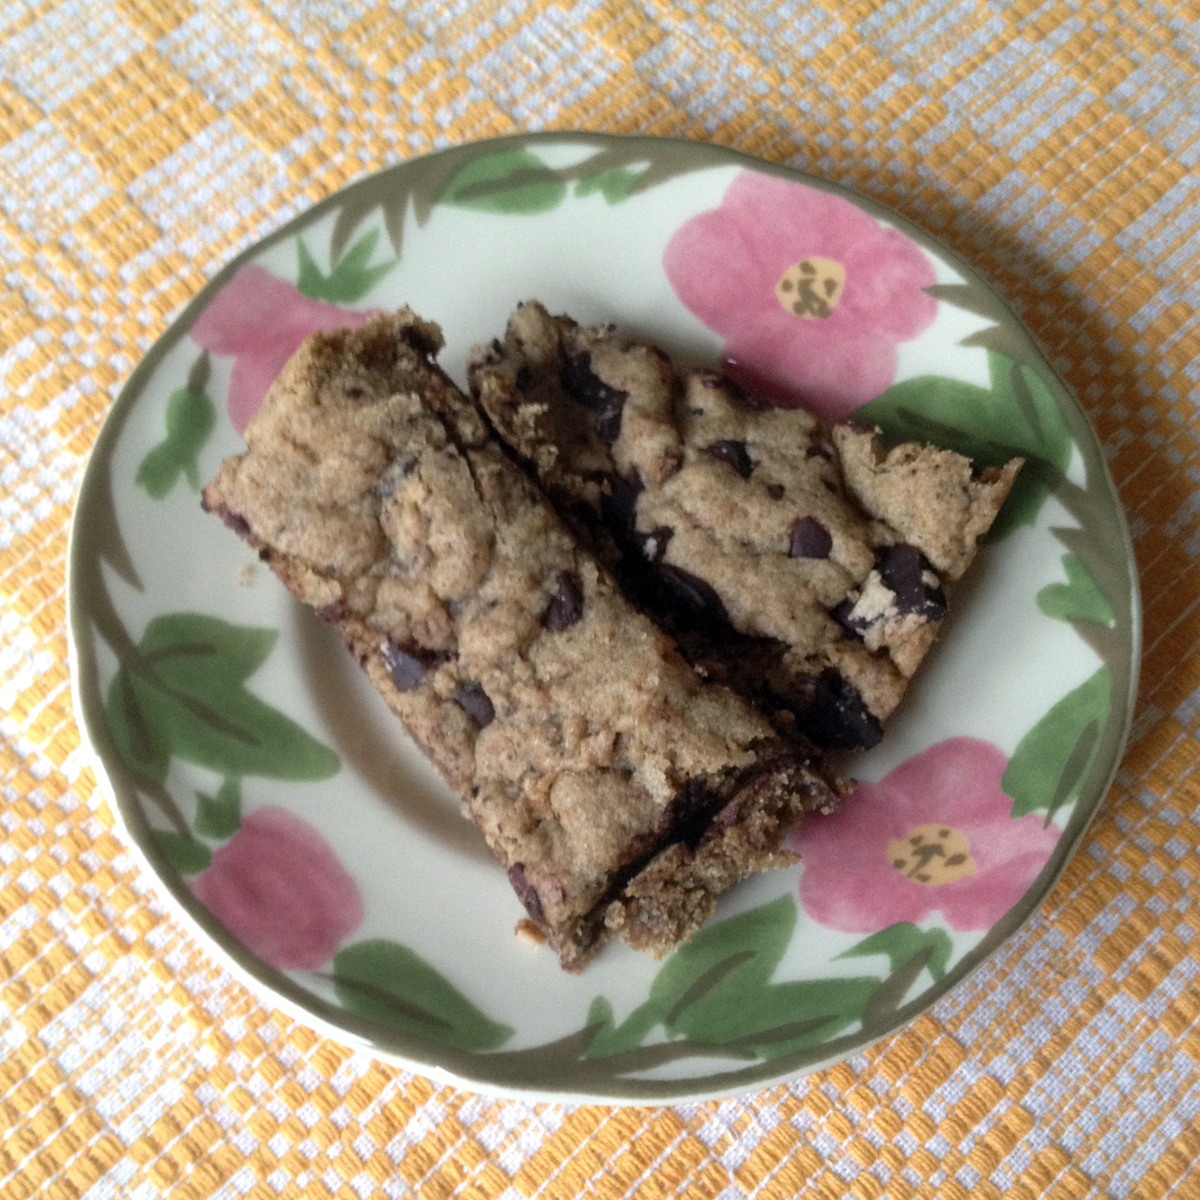
In the Kitchen: Chocolate Chip Cookie Bars

cookies1 Confession: When the windchill dips into the 20s, I feel like baking cookies and making soup.

I did both of these activities over the weekend after we raked what seemed like 2.5 million leaves from our front and back yard...and then fished at least 1.2 million leaves out of our pool.

When pool water feels warmer than the air temperature, you know it's cold outside....Well at least by Tennessee standards. I can tell you that our Southern bones are not made for this cold snap!

After two days of raking and fishing, we had earned our cookie bars.

I'm not sure we have earned our Thanksgiving week dinners though. Darn.

Maybe it's a good thing we still have a few leaves left to rake...

leaves1

leaves2

Now onto the recipe. I was short on time this week, so I didn't put together the recipe card art. I'm not sure anyone really cares about that anyway. The recipe itself is what matters, right?

Please note -- this recipe is technically vegan, although some vegans would require vegan sugars, etc. You can always substitute real butter and eggs if you want, but I don't think you'll notice a difference. Corn starch is a wonderful egg replacer, and Earth Balance can be found at most grocery stores.

Chocolate Chip Cookie Bars (Vegan)

-1 cup of Earth Balance Vegan Butter

-1 cup of packed brown sugar

-1/2 cup of granulated white sugar

-3/4 tsp of baking soda

-1/2 tsp of salt

-2 tbsp of corn starch / 6 tbsp of water (egg substitute)

-1 tbsp of vanilla (we buy vanilla in bulk at Costco)

-2 1/2 cups of whole wheat flour (Kroger brand)

-1 package of Baker's semisweet chocolate (cut into pieces)

1. Preheat the oven to 375 degrees. 2. Mix together the butter, sugars, baking soda and salt until they are thoroughly combined. 3. Add the corn starch, water and vanilla to the mixture and beat together. 4. Pour a half cup of the flour into the mixture at a time until everything is combined. 5. Cut your chocolate bar into small, irregular pieces and stir them into the mixture. 6. Spoon the dough into a shallow baking dish (I used a 9 x 13 inch Pyrex dish). 7. Using your spoon (or spoons), press the dough into the dish until it fills the pan. 8. Bake for 15-20 minutes. 9. Enjoy.

Happy Thanksgiving, friends!cookies